A blogging checklist before publishing a post is your final safety check. You use it before you hit publish.
It helps you check SEO, clear writing, links, images, trust, and calls to action. So, your post is easier to read, easier to find, and easier to act on.
In 2025, the average blog post was about 1,333 words, but short posts can still win when each line helps the reader.
Google also says your content should help people first. That means your post must answer the reader, not just chase rankings.
Quick Key Points
- Check the main keyword.
- Fix the title and URL.
- Add internal links.
- Add useful images and alt text.
- Read the post once like a real reader.
- Add one clear next step.
Use this blogging checklist before publishing a post as a repeatable final review. It helps you publish with less doubt and more control.
Quick Blog Publishing Checklist
Use this blogging checklist before publishing a post when your draft looks ready, but your gut says: “Check once more.”
Google says SEO helps search engines understand your content and helps people decide if they should visit it. So, before you publish, check the small things that make a big difference.
Final Checks Before You Hit Publish
| Step | What to Check |
|---|---|
| 1 | Confirm the reader’s search intent. |
| 2 | Add your primary keyword in a natural way. |
| 3 | Write a clear blog title. |
| 4 | Use only one H1 tag. |
| 5 | Add clean H2 and H3 headings. |
| 6 | Write a useful meta description. |
| 7 | Keep the URL slug short. |
| 8 | Add helpful internal links. |
| 9 | Link to trusted external sources. |
| 10 | Compress and rename images. |
| 11 | Add simple image alt text. |
| 12 | Fix grammar and spelling. |
| 13 | Break long text into short parts. |
| 14 | Add one clear CTA. |
| 15 | Preview the post on mobile. |
| 16 | Check page speed. |
| 17 | Add schema if it fits. |
| 18 | Make sure the post can be indexed. |
| 19 | Schedule or publish the post. |
| 20 | Share it and track results. |
My Fast Rule
Do not publish a post just because it is written.
Publish it only when the title, keyword, links, images, mobile view, and CTA all work together.
A 2025 Orbit Media study found the average blog post is 1,333 words and takes almost 3.5 hours to create. That means your final 10-minute check can protect hours of work.
Use this blogging checklist before publishing a post every time; it keeps your blog clean, useful, and ready for Google.
Check Search Intent Before Writing or Publishing
Use a search intent checklist before you publish. It helps you see what your reader wants, not just what your keyword says.
Ask this first: “What is the reader trying to do?” They may want a guide, a quick checklist, a tool list, a template, or one clear answer.
Google says SEO should help search engines understand your content and help users decide if they should visit your page. So, your blog post intent must match the real need behind the search.
Quick Intent Check
| Search Query | Reader Wants |
|---|---|
| how to identify search intent for blog post | simple steps |
| why search intent matters in SEO | reason and proof |
| how to write for user intent | writing method |
Next, match your intro and headings to that need. For example, if the reader wants a checklist, do not start with a long story.
Before publishing, write one line: “After reading this, the reader can _.” That one line is your best search intent checklist.
Verify Your Primary Keyword and Related Keywords
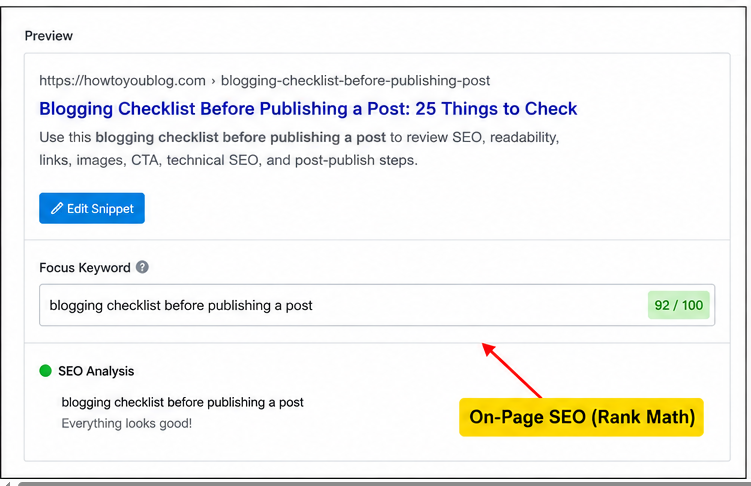
Your SEO checklist for blog posts must start with one main keyword. Pick the phrase your reader will type before they find your post.
Then, add close words around it. For example, use “keyword research before publishing,” “blog post SEO checklist,” and “where to put keywords in blog post.”
Put your main keyword in these places:
| Place | What to do |
|---|---|
| Title | Add it once, in a natural way |
| Intro | Use it in the first few lines |
| URL | Keep it short and clear |
| H2 | Use it only if it fits |
| Meta description | Add it with a clear benefit |
Do not repeat the same keyword again and again. Google says SEO should help search engines understand your page and help people decide if they should visit it.
Here is my simple rule: write for the reader first, then check the keyword. If the sentence sounds strange, remove the keyword or use a related phrase.
Before you publish, ask this: “Can Google understand this page, and can a real person enjoy it?” That is the real goal of an SEO checklist for blog posts.
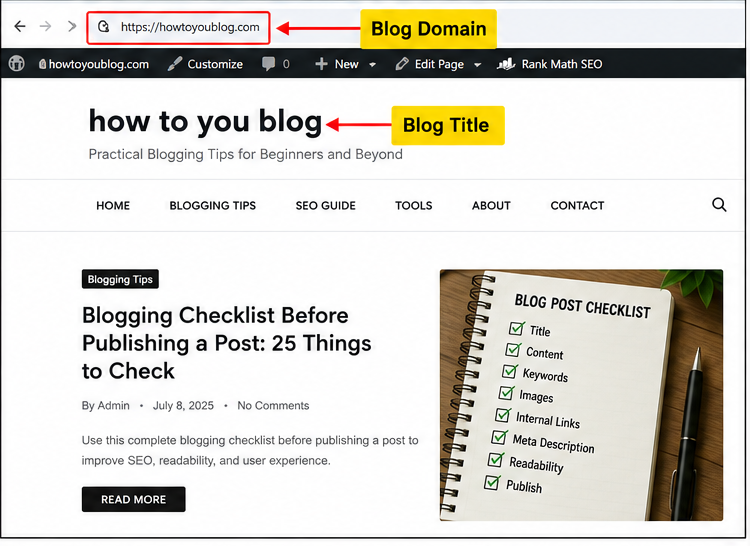
Improve the Blog Title, URL Slug, and Meta Description
Your blog title checklist starts with one rule: be clear first. A clear title gets the click because people know what they will get.
Google says title links help users quickly understand why a result fits their search. So, do not use fake drama or clickbait.
Use a Clear SEO Title
Write your SEO title like a promise. Then make sure the post keeps that promise.
A good title has:
- Main keyword
- Clear benefit
- Simple words
- No fake urgency
- Around 50–60 characters
Example:
| Weak Title | Better Title |
|---|---|
| You Must Read This Before Blogging | Blogging Checklist Before Publishing a Post |
| Shocking Blog SEO Secrets | Blog Post Checklist for Better SEO |
Keep the URL Slug Short
Your URL should look clean. Also, it should tell the topic fast.
Bad URL: /25-things-you-must-check-before-you-publish-your-next-amazing-blog-post
Good URL: /blog-post-checklist
Use lowercase words. Also, remove extra words like “the,” “your,” and “amazing.”
Write a Helpful Meta Description
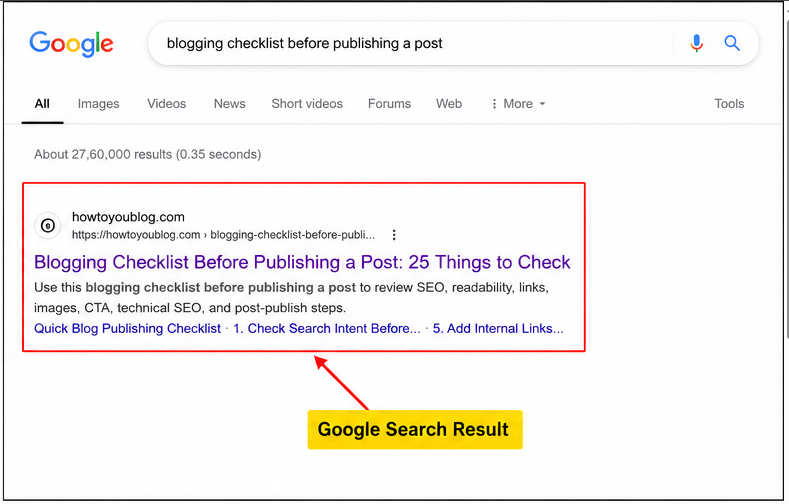
Your meta description checklist is simple: explain the benefit in one short line. Keep it near 150–160 characters when possible.
Example:
Use this blogging checklist before publishing a post to check your title, URL, meta description, SEO, links, and final edits.
Add the year only when you will update the post. Otherwise, an old year can make your post look dead.
Review Content Structure and Readability
Your blog formatting checklist starts with one clear rule: make the post easy to scan before you make it clever.
Most people do not read every word online. Nielsen Norman Group found that users often scan pages, and may read only about 20% to 28% of words on an average visit.
Use Clean Heading Order
Use one H1 only: this is your main blog title.
Then use H2 tags for big sections. Use H3 tags only when you need smaller points under an H2.
| Tag | Use It For |
|---|---|
| H1 | Main post title |
| H2 | Main sections |
| H3 | Sub-points |
| H4 | Rare deep details |
Make the Page Easy to Read
Keep each paragraph short. Two lines are enough in most cases.
Use bullets when readers need to compare, check, or scan fast:
- Key steps
- Common mistakes
- Tool lists
- Quick tips
- Pros and cons
Add a Table of Contents
Add a table of contents if your post has more than 1,500 words or more than 6 H2 sections.
It helps readers jump to the part they need. It also helps search engines understand your blog post heading structure.
Quick Readability Checklist
Before you publish, ask this:
- Can I scan this post in 30 seconds?
- Does each H2 explain one clear idea?
- Are long blocks broken into short parts?
- Can a beginner follow the page without SEO tools?
Good structure is not decoration. It is your silent editor; it helps the reader stay, read, and act.
This simple readability checklist makes your post cleaner, faster, and easier to trust.
Add Internal Links and External Sources
Links are not decoration. They guide your reader and help Google read your site better.
Use this simple internal linking checklist before you publish. Google says every page you care about should have at least one link from another page on your site.
Add 3–5 Internal Links
Add 3 to 5 links to your own related posts. For example: link a “blog SEO checklist” post to your “keyword research guide.”
Also, link from old posts to this new post. This stops your new post from becoming an orphan page.
Prevent Orphan Blog Posts
An orphan post has no internal links pointing to it. Ahrefs defines it as a page with no incoming internal links.
So, after publishing, open 2 or 3 older posts. Then add a natural link to your new post.
Add 1–3 External Sources
Add 1 to 3 trusted outside links. Use sources like Google Search Central, research sites, original reports, or expert blogs.
Do not fear external links. Google says linking to useful outside sources can help build trust.
Use Clear Anchor Text
Do not write “click here.” Write what the reader will get.
| Weak anchor text | Better anchor text |
|---|---|
| Click here | blog post SEO checklist |
| Read more | image SEO tips |
| This guide | keyword research guide |
Good anchor text is short, clear, and related to the linked page. Google also recommends descriptive anchor text.
Fix Broken Links
Before you publish, click every link once. A broken link feels small, but it hurts trust fast.
So, use this final check: add internal links, cite strong sources, fix broken links, and keep your internal linking checklist ready for every post.
Optimize Images, Alt Text, and Featured Image
Your image SEO checklist starts before upload. Big images slow your post, and slow pages lose readers fast.
Google says you should use clear file names, helpful alt text, and responsive images for better image search results. So, rename IMG_4421.jpg to blogging-checklist-example.jpg before upload.
Compress Images First
Compress every image before you add it. A simple rule: keep normal blog images under 150 KB when possible.
Use WebP for most blog images. Use PNG only for screenshots, logos, or sharp text.
Write Helpful Alt Text
Alt text tells Google and screen readers what the image shows. Keep it clear, short, and useful.
Bad alt text: “image SEO checklist keyword blog post.”
Good alt text: “blogger checking image size before publishing a post.”
Use One Strong Featured Image
Use one featured image that matches the post topic. For most blogs, 1200 × 628 px works well for sharing.
Do not add a random stock photo. Use an image that explains the idea at a glance.
Final Image Check
Before you publish, check this:
| Check | What to Do |
|---|---|
| File name | Use simple words |
| File size | Compress it |
| Alt text | Describe the image |
| Featured image | Use one clear image |
| Mobile view | Preview before publish |
This small image SEO checklist helps your post load faster, look better, and feel cleaner for readers.
Check EEAT, Accuracy, and Human Quality
Before you publish, use this EEAT checklist to test trust. Google wants helpful content made for people, not just for search ranks.
EEAT means: real use, clear skill, proof, and trust. So, do not sound like a robot with a clean shirt.
Add one real note from your own work. For example: “I changed a weak title and clicks went up after 14 days.”
Now check each fact. Update old stats, dates, prices, tools, screenshots, and names.
Use sources when a claim may change. Link to Google, research reports, case studies, or known experts.
Also show limits. Say what may not work for a new blog, small niche, or low-budget site.
Use this helpful content checklist:
- Did you add one first-hand point?
- Did you give one clear example?
- Did you cite one trusted source?
- Did you remove vague lines?
- Did you warn the reader?
- Did you update old facts?
- Can the reader act now?
My rule is simple: if a line could fit any blog, delete it. Keep the line only if it helps this reader today.
End with one final human test. Read your post aloud, then use this EEAT checklist once more before you hit publish.
Add CTA and Conversion Path
Your blog CTA checklist needs one clear next step. So, ask the reader to do one thing only.
A CTA means “call to action.” In simple words: tell the reader what to do next.
Match the CTA with the reader’s goal. If they want a quick fix, offer a download.
Use this simple rule:
| Reader Intent | Best CTA |
|---|---|
| Wants help fast | Download the checklist |
| Wants to learn more | Read the next guide |
| Wants updates | Join the newsletter |
| Wants expert help | Book a call |
Place your CTA after a useful section, not in the middle of a thought. Also, add one near the end.
For example: “Download the free blog post checklist before you publish.” This feels clear, helpful, and natural.
Avoid five buttons on one page. Too many choices slow the reader down.
Your blog conversion checklist is simple: one page, one reader, one next step. That is how your blog CTA checklist turns attention into action.
Technical SEO Checks Before Publishing
Before you publish, run this small technical SEO checklist. It helps Google find, read, and show your blog post the right way.
Check Mobile View First
Open your post on your phone. Most readers will see it there first.
Check the title, images, buttons, table, and menu. If anything looks broken, fix it before publish.
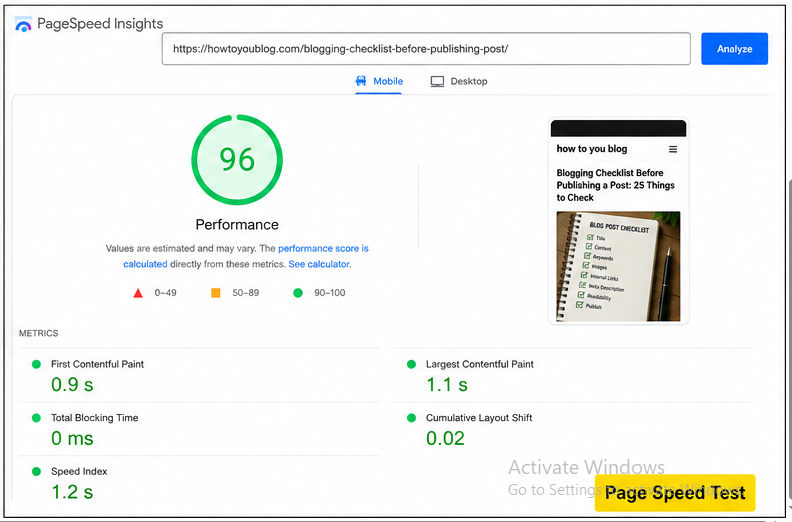
Test Page Speed
A slow post loses readers fast. In 2025, HTTP Archive found the median mobile inner page reached 1.8 MB, so keep your page light.
Compress images, remove extra plugins, and avoid heavy scripts. Then test the page in PageSpeed Insights.
Check Indexing Settings
Make sure your post does not have a noindex tag. Google says noindex can stop a page from showing in Search.
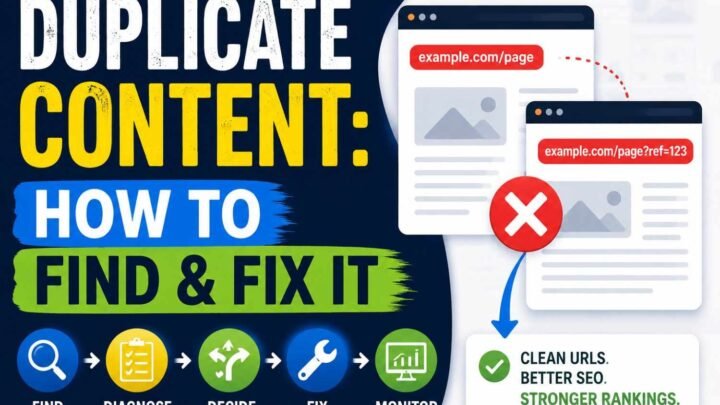
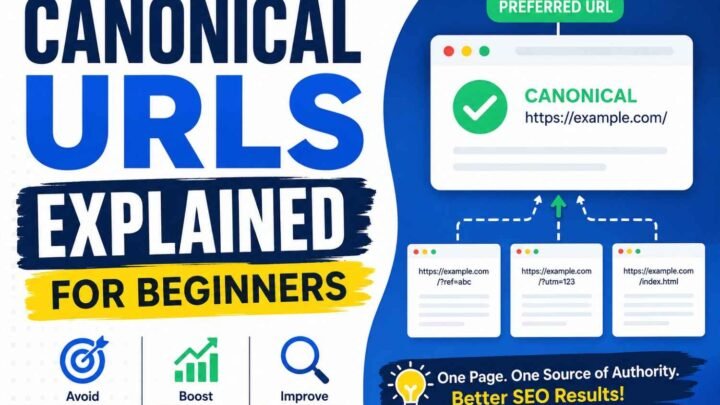
Also check your canonical tag. It should point to the final post URL, not a draft or duplicate page.
Add Basic Schema
Use Article schema or BlogPosting schema. Google uses structured data to better understand page content and support rich results.
Do not add fake schema. Add only what the reader can see on the page.
Preview Search and Social Look
Check your SEO title, URL, and meta description. Also add an Open Graph image, so the post looks clean on Facebook, LinkedIn, and X.
Final Technical Check
Before you hit publish, confirm these points:
| Check | What You Must Do |
|---|---|
| Mobile preview | Page looks clean on phone |
| Speed | Images are compressed |
| Canonical | Points to final URL |
| Noindex | Turned off |
| Schema | Valid and honest |
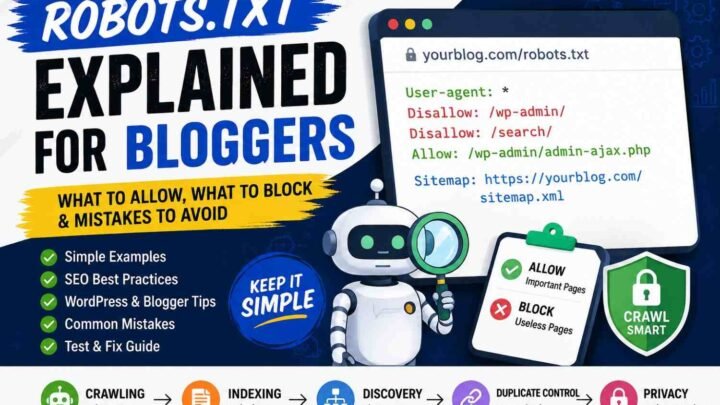
| Sitemap | Post can enter sitemap |
| Layout | No broken buttons or tables |
This indexability checklist takes 10 minutes. But it can save your post from ranking trouble later.
Final Proofreading and Publishing Workflow
Use this final checklist before publishing when your post feels ready. This last 10-minute check saves you from small mistakes that hurt trust.
First, read the post aloud. Your ear catches odd lines faster than your eye.
Next, check grammar, spelling, and flow. Tools help, but a human check still matters because AI tools can miss tone and context.
Then, check every fact, number, name, year, and source. One wrong stat can make the whole post feel weak.
After that, click every link. Fix broken links, wrong pages, and unclear anchor text.
Now preview the post on desktop and mobile. Google also says useful page details, like clear summaries and page information, help users understand your content.
Before you hit publish, confirm these final items:
| Check | What to do |
|---|---|
| Category | Pick one main topic |
| Tags | Use only useful tags |
| Author | Confirm the name |
| Date | Show the right date |
| CTA | Add one next step |
| Schedule | Pick your best time |
Finally, schedule the post when your readers are active. This final checklist before publishing helps you publish clean, clear, and ready-to-read content.
After Publishing: Don’t Stop at Publish
Your post publish checklist starts after you hit publish. A blog post is not done until Google can find it, readers can see it, and you can track it.
First, submit your new URL in Google Search Console. Google says you can use URL Inspection to request indexing for pages you own.
Then, share the post where your readers already spend time. Use LinkedIn for work tips, X for short ideas, email for warm readers, and YouTube Shorts for quick lessons.
Next, add internal links from older posts. This helps readers move through your site, and it also helps your new post avoid becoming an orphan page.
Use this simple blog promotion checklist:
| Task | When to do it |
|---|---|
| Submit URL in Search Console | Same day |
| Share on social media | Same day |
| Add 3 internal links | Within 24 hours |
| Send to email list | Within 2 days |
| Track clicks and impressions | After 7–14 days |
| Refresh the post | After 60–90 days |
Also, repurpose one post into many small pieces. For example: turn one tip into a LinkedIn post, one checklist into an email, and one key point into a short video.
Do not share once and disappear. Many bloggers spend hours writing, but the post dies because they never promote it.
Finally, check Search Console for impressions, clicks, and average position. Google explains these metrics in its Performance reports.
Use this post publish checklist every time. Publish the post, push it, measure it, and improve it after 60–90 days.
Beginner vs Advanced Blog Checklist
Your blog checklist before publishing should fit your work level. So, do not copy an agency checklist when you are still fixing titles and grammar.
| User Type | Best Checklist |
|---|---|
| Beginner | Check title, keyword, headings, grammar, images, and CTA. |
| Small business | Check SEO, internal links, CTA, and lead magnet. |
| Affiliate blogger | Check search intent, comparison table, disclosure, and product links. |
| SEO writer | Check keyword map, schema, links, SERP gap, and Google Search Console. |
| Agency/team | Check workflow, editor review, QA, technical SEO, and approval steps. |
If you are new, keep it simple: ask, “Can a reader understand this in one read?” Then check your title, intro, headings, image size, spelling, and final CTA.
However, if you write for a business, your checklist must go deeper. Add internal links, a clear offer, a lead form, and one next step.
Affiliate bloggers need more trust checks. So, add product pros, cons, pricing notes, real use cases, and disclosure before you publish.
SEO writers should check search intent and tracking. Also, use Google Search Console after publishing to watch clicks, impressions, and ranking changes.
Agencies need a clean approval flow. In my view, the safest blog checklist before publishing is the one your whole team can follow without asking extra questions.
Common Mistakes to Avoid
Your blogging checklist before publishing a post should stop small mistakes before they hurt traffic. So, check the page like a reader, not like a writer.
Key mistakes
- Publishing without search intent: Ask, “What does the reader want now?”
- Stuffing keywords: Use the main phrase once or twice; write for people.
- Using long URLs: Keep the slug short, clean, and easy to read.
- Skipping the meta description: Google may use it as your search snippet when it helps the reader.
- Adding no internal links: Link to 2 or 3 useful posts on your site.
- Ending with no CTA: Tell the reader the next step: comment, download, read, or buy.
- Uploading huge images: Compress images and add clear alt text; Google uses alt text to understand images.
- Writing a generic AI-style intro: Start with the reader’s real pain.
- Adding no original insight: Share one test, mistake, result, or field example.
- Forgetting promotion: After publishing, share it, link to it, and check Search Console.
In 2025, the average blog post was 1,333 words, so short posts can work when each line helps. Use this blogging checklist before publishing a post every time, and cut anything that does not help the reader.
FAQ Section
What should I check before publishing a blog post?
Use a blogging checklist before publishing a post: check title, keyword, headings, links, images, grammar, CTA, and mobile view.
Also, check if the post helps the reader fast; Google says SEO should help users and search engines understand your page.
How many keywords should a blog post target?
Target one main keyword first.
Then add 3 to 5 close phrases, like blog post checklist, SEO checklist, and publishing checklist.
Is a meta description still important?
Yes, it still helps.
Google may use it as your search snippet when it fits the page well.
How long should a blog post be?
Write only as much as the topic needs.
In 2025, Orbit Media found the average blog post was 1,333 words.
How many internal links should I add?
Add 3 to 5 useful internal links.
Link only when the next page truly helps the reader.
Should I update old blog posts before publishing new ones?
Yes, update old posts when they support the new post.
Then link them together, so readers and Google can follow the topic path.
Do I need schema for every blog post?
No, not every post needs schema.
But FAQ schema or Article schema can help Google understand the page better.
What is the biggest mistake bloggers make before publishing?
The biggest mistake is publishing too fast.
So, use a blogging checklist before publishing a post, and fix weak titles, missing links, poor examples, and unclear answers first.

Leave a Reply