A few years ago, if you needed a good image for your blog, YouTube thumbnail, Instagram post, or presentation, you had two choices. Either learn graphic design or spend money hiring someone. For many people, neither option felt easy.
I remember spending way too much time searching through free stock photo websites. Sometimes I’d scroll for half an hour and still couldn’t find the image I had in my head. It was frustrating. You know what you want, but you can’t create it.
That’s one reason AI generated images have exploded in popularity.
Today, you can type a simple sentence like, “A cozy coffee shop on a rainy evening,” and an AI image generator can create it in seconds. Not just one version, either. Usually, you’ll get several options to choose from.
What’s really surprising is that you don’t need to be an artist, photographer, or designer anymore. Anyone can learn how to create AI images. Students use them for projects. Bloggers use them for featured images. Small business owners create product photos and social media graphics. Even people who have never opened a design tool before are making impressive images.
And honestly, that’s why so many people are searching questions like, “How do I create AI images?” or “What is the easiest AI image generator?” The process has become simple, fast, and in many cases, completely free.
If you can type a text message, you’re already halfway there.
2. What Are AI Images?
A few years ago, if someone told me I could create a picture just by typing a sentence, I probably would’ve laughed. It sounded like something from a science-fiction movie. But now, that’s exactly what AI images are.
In simple words, AI generated images are pictures created by artificial intelligence instead of a human artist or photographer. You type a description, often called a prompt, and the AI creates an image based on what you asked for.
For example, if you type, “A small coffee shop on a rainy evening with warm lights and people reading books,” an AI image generator can turn those words into a picture within seconds. Pretty wild when you think about it.
Most of these tools use text to image AI technology. The process is surprisingly simple from a user’s point of view. You describe what you want, click a button, and the AI creates one or more images that match your description.
One thing that confuses many beginners is the difference between AI photo, AI art, AI illustration, and AI image editing.
An AI photo tries to look like a real photograph. Sometimes it’s so realistic that you might think an actual camera took it.
AI art is more creative. It can look like a painting, fantasy artwork, watercolor piece, or something completely imaginative.
An AI illustration usually has a drawn or graphic style. Think of cartoon characters, storybook drawings, icons, or comic-style images.
Then there’s AI image editing, which is a little different. Instead of creating a new image from scratch, the AI helps improve or change an existing image. You can remove backgrounds, replace objects, fix colors, or even add new elements.
The easiest way to understand it is this: an AI photo generator creates realistic photos, an AI art generator creates artistic visuals, AI illustrations create graphic-style drawings, and AI image editing changes pictures you already have.
If you’re a blogger, student, business owner, or just someone who likes being creative, AI images can save a lot of time. You don’t need expensive cameras, drawing skills, or years of design experience anymore. Sometimes all you need is a good idea and a few words.
Read More: How to Use Google Gemini?
3. How Does an AI Image Generator Work?
If you’ve ever typed a few words into an AI image generator and watched a picture appear in seconds, you’ve probably wondered, “How on earth did it do that?” I had the same question the first time I used one. It almost felt like magic. But there is actually a process happening behind the scenes.
The good news? You don’t need to be a programmer or tech expert to understand how AI image generators work.
It all starts with a text prompt. A prompt is simply a description of what you want to see. You type your idea into the tool, and the AI tries to turn those words into an image.
For example, you might write:
“A small tea shop in Hyderabad during rain, warm lights, realistic photo style.”
Pretty simple, right?
Once you enter the prompt, the AI begins analyzing the words. It looks at the subject, objects, colors, style, mood, lighting, and even small details that you mention. If you ask for a rainy evening scene, the AI understands that rain, reflections on the road, cloudy skies, and warm lights might all fit together naturally.
This is where the image generation model comes in. Through machine learning, the model has studied millions of images and patterns. It has learned what a tea shop looks like, what rain looks like, and how realistic photography is different from a cartoon drawing.
One thing many people ask is, “Does AI copy images?”
Not exactly. AI doesn’t usually pull out one existing photo and paste it into your result. Instead, it learns patterns from huge amounts of training data and creates something new based on what it has learned. Think of it like a person who has seen thousands of paintings and then creates their own artwork from memory and experience.
After understanding your prompt, the AI creates one or more image variations. Sometimes the first result is great. Sometimes it’s…well, a little weird. I’ve seen AI give people six fingers, floating teacups, and some very strange-looking cats.
That’s why the final step is important: refinement.
You can adjust the prompt, add more details, remove things you don’t like, or change the style completely. Maybe you want softer lighting, a wider camera angle, or a more realistic look. Small changes often make a big difference.
So, when people ask, “How does AI create images from text?” the answer is actually pretty simple. You describe an idea, the AI interprets it, creates image options, and then you fine-tune the result until it looks the way you imagined it.
Read More: how to summarize YouTube videos with AI?
4. Best Tools to Create AI Images
A few months ago, a friend asked me a simple question.
“Which AI image generator should I use?”
Sounds easy, right?
Well… not really.
The truth is that there isn’t one perfect tool for everyone. The best AI image generator for a blogger may not be the best choice for a graphic designer. A YouTuber creating thumbnails has different needs than someone making product photos for an online store.
I’ve spent a lot of time testing these tools, sometimes just out of curiosity and sometimes because I needed images quickly for content projects. Some impressed me immediately. Others looked amazing in ads but felt confusing once I actually used them.
So instead of giving you a random list, I’ll tell you who each tool is best for.
Quick Comparison Table
| Tool | Best For | Free Plan | Beginner Friendly | Best Use Case |
|---|---|---|---|---|
| ChatGPT Images | Everyday image creation and editing | Yes | Very Easy | Bloggers, content creators |
| Adobe Firefly | Commercial projects | Yes | Easy | Marketing materials, business graphics |
| Canva AI | Social media content | Yes | Very Easy | Instagram posts, Pinterest pins |
| Midjourney | Artistic and cinematic images | Limited | Moderate | Creative artwork and stunning visuals |
| Stable Diffusion | Full customization | Yes | Advanced | Developers and power users |
| Leonardo AI | Gaming and creative assets | Yes | Easy | Character designs and concept art |
| Ideogram | Images with text | Yes | Easy | Posters, ads, social graphics |
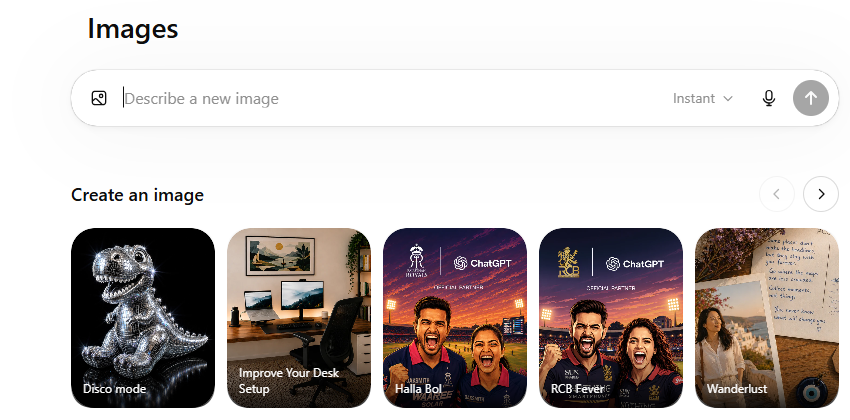
ChatGPT Images
If you’re completely new to AI image generation, I’d probably start here.
Why?
Because it feels natural. You simply describe what you want like you’re talking to another person.
For example, you can type:
“Create a realistic photo of a coffee shop during a rainy evening with warm lights.”
That’s it.
You can also ask for edits without starting over. Maybe you want brighter lighting or a different background. Just tell it.
I find ChatGPT Images especially useful for blog featured images, simple illustrations, YouTube ideas, and social media graphics. The learning curve is tiny, which is why many people consider it one of the best AI image generators for beginners.
Adobe Firefly
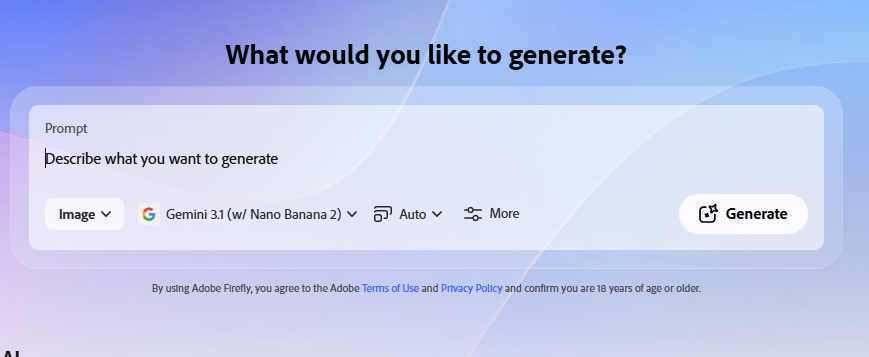
Adobe Firefly is a tool I often recommend when people are creating images for business purposes.
Many creators worry about copyright issues. Firefly was built with commercial use in mind, which gives some users extra peace of mind.
The images look clean, professional, and polished. If you’re creating marketing graphics, advertisements, website banners, or product visuals, Firefly does a solid job.
It may not always produce the dramatic artwork you’ll see from Midjourney, but it feels dependable.
And sometimes dependable is exactly what you need.
Canva AI
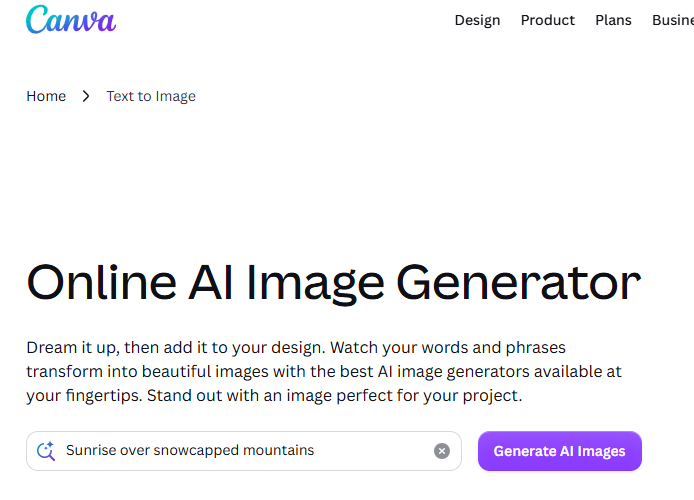
Canva feels like that friend who makes everything easier.
If you already use Canva for social media posts, presentations, or blog graphics, you’ll probably enjoy its AI image generator too.
The biggest advantage isn’t just image creation. It’s what happens afterward.
You can generate an image and immediately place it into an Instagram post, Pinterest pin, YouTube thumbnail, or Facebook ad without switching between different tools.
For busy creators, that’s a huge time saver.
Midjourney
Now we’re entering the “wow” territory.
The first time I saw a Midjourney image, I honestly stopped scrolling for a few seconds.
The artwork looked almost like something from a movie poster.
Midjourney is famous for creating cinematic scenes, fantasy artwork, dramatic portraits, and highly detailed visuals. If your goal is beautiful, eye-catching images, it’s hard to ignore.
The downside?
Beginners sometimes find it a little confusing at first. There’s a learning curve. But once you get comfortable, the results can be incredible.
Stable Diffusion
Stable Diffusion is for people who love control.
A lot of control.
You can customize almost everything, install models, fine-tune settings, and create highly specific image styles.
For casual users, this might feel overwhelming.
But developers, designers, and advanced users often love it because they aren’t locked into a single platform.
Think of it as the “DIY” option in the AI image world.
Leonardo AI
Leonardo AI has become popular among game developers, digital artists, and creative professionals.
It shines when creating characters, fantasy environments, concept art, and gaming assets.
I’ve noticed that many people who create storytelling content or role-playing game projects tend to gravitate toward Leonardo because it offers strong visual consistency.
That’s important when you’re building a series of related images.
Ideogram
Creating AI images with readable text has always been a challenge.
Many AI generators still struggle with spelling words correctly inside images.
That’s where Ideogram stands out.
If you’re creating posters, advertisements, social media graphics, event banners, or promotional images with text, Ideogram usually performs much better than most competitors.
It’s one of those tools that solves a very specific problem, and it solves it well.
Which AI Image Generator Is Best?
If you’re still unsure, here’s my simple recommendation:
- Best for beginners: ChatGPT Images
- Best free AI image generator: Canva AI
- Best for bloggers: ChatGPT Images
- Best for YouTube thumbnails: Canva AI and Midjourney
- Best for product photos: Adobe Firefly
- Best for artistic images: Midjourney
- Best for advanced users: Stable Diffusion
- Best for game assets: Leonardo AI
- Best for posters with text: Ideogram
Honestly, don’t spend weeks trying to find the perfect tool.
Pick one. Create a few images. Make some mistakes.
That’s exactly how most people learn.
You’ll quickly discover which tool feels right for the type of images you want to create.
5. How to Create AI Images Step by Step
If you’ve never used an AI image generator before, don’t worry. The whole process is much easier than most people think.
The first time I tried creating an AI image, I expected something complicated. Honestly, I thought I would need design skills or some technical knowledge. I was wrong. I typed a few words, clicked a button, and within seconds an image appeared on my screen.
Was it perfect? Not even close.
But it showed me how powerful these tools can be when you know how to use them properly.
If you’re wondering how to create AI images step by step, here’s the exact process that works for beginners and experienced creators alike.
Step 1: Choose the Right AI Image Generator
Before you create anything, you need a tool.
Different AI image generators are built for different purposes. Picking the right one can save you a lot of frustration.
For example:
- Want social media graphics? Canva AI works well.
- Need blog images? ChatGPT image generation is simple and beginner-friendly.
- Looking for realistic photos? Midjourney and Leonardo AI are popular choices.
- Creating cartoon characters or digital art? Most AI art generators can handle that.
- Need product images for an online store? Tools like Adobe Firefly and Leonardo AI can help.
Think about what you’re trying to create before choosing a platform.
A friend of mine runs a small online clothing store. He tried using an AI art tool to create product photos and got strange results. Once he switched to a tool designed for commercial images, everything looked much better.
The tool matters more than people realize.
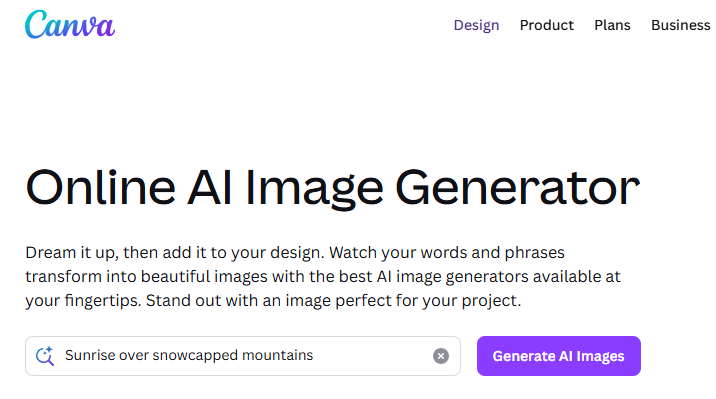
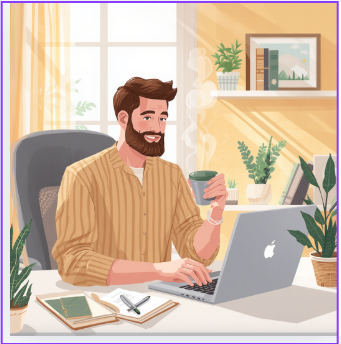
For example, here I selected Canva AI image generator.
Step 2: Write a Clear AI Image Prompt
This is where most people either get great results or terrible ones.
The AI only knows what you tell it.
A lot of beginners type something like:
“Create a dog.”
Sure, you’ll get a dog image.
But it probably won’t look anything like what you imagined.
Instead, be specific.
Try something like:
“A happy golden retriever sitting in a green park during sunset, realistic photography style, warm lighting, shallow depth of field, smiling expression.”
See the difference?
A good AI image prompt usually includes:
- Subject
- Style
- Background
- Lighting
- Mood
- Camera angle
- Colors
- Image size
The more details you provide, the easier it becomes for the AI to understand your vision.
You don’t need a huge paragraph. Just enough information to paint a clear picture.
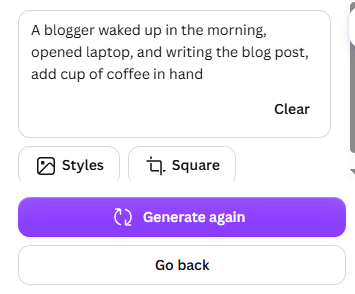
Step 3: Select the Style and Aspect Ratio
Once your prompt is ready, choose how you want the image to look.
Most AI image generators allow you to pick a style.
Some common options include:
- Realistic photo
- Watercolor painting
- Cartoon
- Anime
- Digital art
- Sketch
- 3D render
Then choose the image size or aspect ratio.
This part is easy to overlook, but it makes a big difference.
For example:
- 1:1 (Square) for Instagram posts
- 16:9 for blog banners and YouTube thumbnails
- 9:16 for Instagram Reels, YouTube Shorts, and TikTok
- 4:5 for social media feed posts
I’ve made this mistake myself. I once created a great-looking image and then realized it was the wrong size for the blog banner I needed.
A few extra seconds here can save you from starting over later.
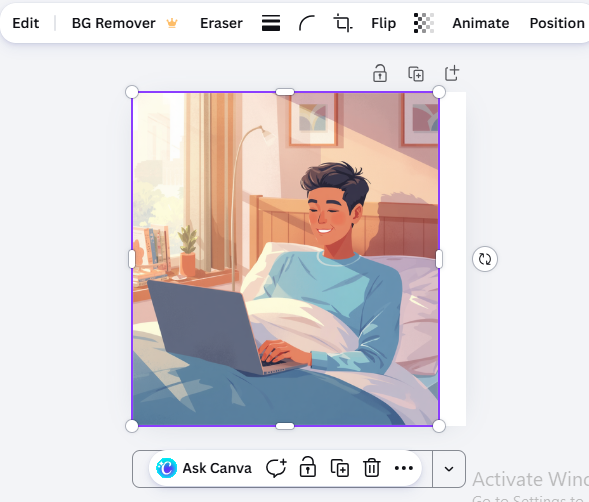
Step 4: Generate Multiple Image Variations
Now comes the fun part.
Click the generate button and let the AI work.
Most tools create several versions of the same idea.
Here’s something many beginners don’t realize:
Your first result probably won’t be perfect.
And that’s completely normal.
Sometimes the lighting feels off.
Sometimes a face looks strange.
Sometimes the background isn’t what you imagined.
Don’t get discouraged.
Professional creators often generate five, ten, or even twenty versions before choosing the best one.
Think of AI image creation as brainstorming with a creative assistant. You’re exploring ideas together, not expecting magic on the first attempt.
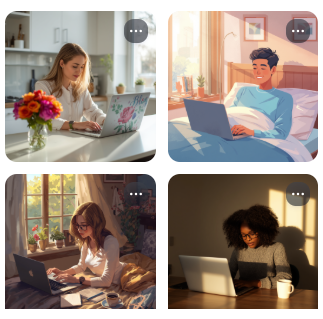
Step 5: Refine Your Prompt
If the image isn’t quite right, don’t start from scratch.
Make small adjustments.
This is one of the biggest secrets behind creating impressive AI images.
Change one detail at a time.
For example:
Instead of:
“Beautiful office”
Try:
“Modern office with large glass windows, natural daylight, clean desks, realistic photography style.”
Still not right?
Adjust the lighting.
Change the camera angle.
Add color preferences.
Specify the mood.
The goal is to guide the AI gradually.
When you change too many things at once, it becomes hard to know which adjustment actually improved the image.
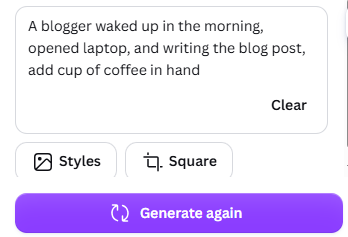
Small changes usually produce better results.
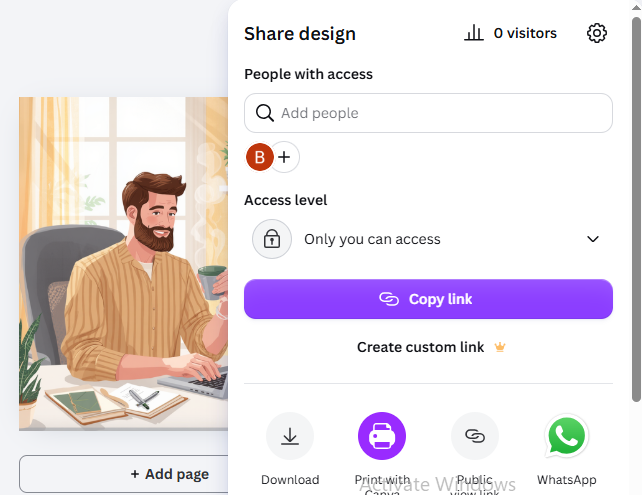
Step 6: Edit and Export the Final Image
Once you’re happy with the image, spend a few minutes polishing it.
Most AI tools include basic editing features.
You can:
- Crop unwanted areas
- Remove small mistakes
- Improve colors
- Enhance sharpness
- Replace backgrounds
- Resize the image
If you’re creating content for a blog, YouTube channel, or business, you might also want to add text using Canva or another design tool.
AI-generated text inside images has improved a lot, but it can still make funny mistakes now and then.
Trust me, finding a random misspelled word on your thumbnail after publishing isn’t a great feeling.
Before exporting, double-check everything.
Make sure the image looks natural, fits your purpose, and matches the size requirements for your platform.
That’s it.
Now you know how to generate AI images from text, even if you’ve never touched an AI image generator before.
The process is simple:
Choose a tool, write a clear prompt, pick a style, generate variations, refine the prompt, and make final edits.
The more you practice, the better your images become. After a few attempts, you’ll start noticing which prompt styles work best and which details make the biggest difference.
6. AI Image Prompt Formula for Better Results
When people first try creating AI images, they usually type something simple like, “Create a dog in a park.”
Sometimes the result looks okay. Sometimes it looks… weird. Maybe the dog has extra legs. Maybe the park looks like it’s on another planet. It happens.
The truth is, most bad AI images come from vague prompts, not bad AI tools.
I learned this the hard way. The first time I tried creating an image for a blog post, I typed only a few words and expected magic. The image looked nothing like what I had in mind. After a bit of experimenting, I realized that AI works much better when you give it clear instructions.
Think of it like giving directions to a friend. The more details you provide, the easier it is for them to understand what you want.
A simple AI image prompt formula that works surprisingly well is:
Subject + Action + Location + Style + Lighting + Mood + Camera Angle + Colors + Aspect Ratio
Let’s break that down.
- Subject – Who or what is in the image?
- Action – What are they doing?
- Location – Where is it happening?
- Style – Realistic photo, watercolor, cartoon, digital art, etc.
- Lighting – Morning sunlight, warm evening light, studio lighting.
- Mood – Happy, dramatic, peaceful, energetic.
- Camera Angle – Close-up, wide shot, aerial view.
- Colors – Bright colors, pastel colors, dark tones.
- Aspect Ratio – Square, landscape, portrait, 16:9, 9:16.
Here’s a simple example:
“A young Indian student studying on a laptop in a small room, realistic photo style, warm evening light, soft shadows, focused mood, eye-level camera angle, natural colors, 16:9.”
Notice how much information the AI receives. That’s why the image usually comes out much closer to what you’re imagining.
If you’re wondering how to write AI image prompts that actually work, don’t overthink it. Just describe the scene as if you’re explaining it to someone sitting next to you.
To make things even easier, here are a few ready-to-use prompt templates.
Blogger Image Prompt
“A person writing a blog post on a laptop in a cozy home office, realistic photography, natural daylight through window, clean workspace, professional atmosphere, soft colors, wide-angle shot, 16:9.”
YouTube Thumbnail Prompt
“Confident young creator pointing at a glowing laptop screen, surprised expression, vibrant colors, dramatic lighting, high energy, bold background, thumbnail style, 16:9.”
Instagram Post Prompt
“Young woman enjoying coffee at a rooftop cafe during sunset, warm golden light, modern lifestyle photography, vibrant colors, cheerful mood, square format, 1:1.”
Product Photo Prompt
“Premium wireless earbuds placed on a clean white table, studio lighting, sharp focus, luxury product photography, soft shadows, minimalist background, 4:5.”
Real Estate Image Prompt
“Modern luxury villa with landscaped garden, bright morning sunlight, realistic architectural photography, blue sky, wide-angle view, highly detailed, 16:9.”
Festival Greeting Prompt
“Colorful Diwali celebration with glowing diyas, decorative lights, festive atmosphere, rich colors, joyful mood, digital artwork, high detail, 16:9.”
Cartoon Avatar Prompt
“Friendly cartoon avatar of a young professional wearing glasses, smiling face, colorful illustration style, clean background, modern digital art, portrait format.”
One thing I’ve noticed after creating hundreds of AI images is that tiny prompt changes can make a huge difference. Changing “sunlight” to “golden sunset light” or “house” to “luxury beach house” can completely transform the final result.
So if your first image doesn’t look right, don’t give up. Tweak a few words. Try again. Most of the time, the perfect image is only a couple of prompt edits away.
7. Best AI Image Prompt Examples
One thing I learned after creating hundreds of AI images is this: the quality of your image usually comes down to the quality of your prompt.
I remember when I first tried an AI image generator. My prompt was something like, “Create a beautiful house.” The result? A weird-looking building that didn’t match what I had in mind at all.
Then I started adding more details. The difference was honestly surprising.
If you’re new to this, don’t worry. You don’t need to be a designer or an artist. You just need a clear description of what you want. Below are some AI image prompt examples you can copy, edit, and use right away.
Realistic Photo Prompt
Want an image that looks like a real photograph?
AI Photo Prompt Example:
“A young Indian woman reading a book in a cozy coffee shop, warm morning sunlight through large windows, realistic photography, natural skin texture, shallow depth of field, professional DSLR camera, high detail.”
This type of prompt works well for blog posts, social media content, and website banners.
Blog Featured Image Prompt
Blog images often need to grab attention without looking too busy.
AI Image Prompt Example:
“A person working on a laptop while writing a blog post, modern home office, notebook and coffee mug on desk, bright natural lighting, clean workspace, realistic style, 16:9 aspect ratio.”
I’ve used prompts like this for article thumbnails, and they usually look much more professional than generic stock photos.
YouTube Thumbnail Prompt
YouTube thumbnails need strong emotions and bold visuals.
AI Prompt for YouTube Thumbnail:
“Excited young entrepreneur pointing at a laptop screen showing rising traffic charts, surprised facial expression, vibrant colors, dramatic lighting, high contrast, YouTube thumbnail style, eye-catching composition.”
A small tip: exaggerating emotions slightly often creates better thumbnails because viewers notice them faster.
Instagram Post Prompt
Instagram images tend to perform better when they feel colorful and visually pleasing.
AI Image Prompt Example:
“Beautiful travel scene in Goa during sunset, golden sky, palm trees, beach waves, vibrant colors, Instagram aesthetic, soft lighting, highly detailed photography.”
Simple. Bright. Easy to share.
Product Image Prompt
If you’re selling products online, AI can save a lot of time.
AI Product Photo Prompt:
“Luxury black wristwatch placed on a polished wooden table, soft studio lighting, blurred background, premium product photography, ultra realistic, high resolution.”
This works great for mockups, eCommerce stores, and marketing materials.
Cartoon Avatar Prompt
Cartoon avatars are fun and surprisingly popular.
AI Art Prompt Example:
“Friendly cartoon character of a young man with glasses, smiling face, colorful hoodie, modern digital illustration style, clean background, social media profile picture.”
You can easily change the clothing, hairstyle, colors, or expression to match your personality.
Logo Idea Prompt
AI shouldn’t replace a professional logo designer completely, but it’s fantastic for brainstorming ideas.
AI Logo Prompt Example:
“Minimalist logo concept for a digital marketing company, modern typography, blue and white color scheme, clean lines, professional design, simple vector style.”
Sometimes one AI-generated idea sparks an even better idea later.
Festival Poster Prompt
Festival posters need energy, color, and celebration.
AI Image Prompt Example:
“Colorful Diwali celebration poster, glowing diyas, festive lights, fireworks in the night sky, joyful atmosphere, traditional Indian decorations, vibrant colors, poster design.”
These prompts work well for social media greetings and community events.
Business Advertisement Prompt
A business ad should quickly communicate value.
AI Ad Prompt Example:
“Professional business team discussing ideas in a modern office, confident expressions, bright environment, success and growth theme, advertising banner design, premium corporate style.”
Many small business owners use similar prompts to create marketing visuals without hiring expensive photographers.
Website Hero Image Prompt
The hero image is usually the first thing visitors see on a website.
AI Website Hero Prompt Example:
“Modern technology workspace with laptop, smartphone, and digital analytics dashboard, clean design, bright lighting, futuristic atmosphere, professional website hero image, wide composition.”
This style works especially well for software companies, bloggers, startups, and online service businesses.
A Quick Thought Before You Generate
You don’t have to get the perfect image on the first attempt. Honestly, most people don’t.
The best approach is to start with a simple prompt, generate the image, look at what feels wrong, then adjust a few details and try again. Sometimes changing just one phrase—like adding “golden hour lighting” or “realistic photography”—can completely change the result.
That’s the fun part of creating AI images. It feels a little like giving directions to an artist. The clearer you are, the better the final image becomes.
8. How to Create Realistic AI Images
The first time I used an AI photo generator, I was honestly impressed. Then I looked a little closer.
The person’s skin looked like plastic. The smile felt strange. The background was so perfect that it almost looked fake. That’s when I realized something important: creating realistic AI images isn’t just about typing a few words and clicking “Generate.”
A lot of people wonder, “Why do AI images look fake?” Most of the time, it’s because the prompt is either too vague or trying to force too many details into one image.
One trick that works surprisingly well is using real camera language. Instead of writing “a beautiful woman standing outside,” try something more specific like:
“A woman standing in a small city park, photographed with an 85mm lens, soft natural morning light, candid photography style.”
See the difference? It gives the AI a clearer picture of what you’re trying to create.
Natural lighting also makes a huge difference. Real life isn’t lit like a movie set every second of the day. If you want photorealistic AI images, mention things like golden-hour sunlight, cloudy daylight, window light, or soft evening shadows. Those little details help the image feel more human.
Something else I’ve noticed is that beginners often overload their prompts. They ask for twenty different things at once.
A young businessman, luxury car, mountain background, sunset, city skyline, flying birds, dramatic clouds, expensive watch, futuristic style…
That’s usually when things start getting weird.
Keep it simple. Focus on the main subject first. You can always refine the image later.
Another secret? Add imperfections.
Real people have messy hair sometimes. Shirts wrinkle. Roads have cracks. Coffee cups leave stains on tables. Life isn’t perfect, and that’s exactly why it feels real.
When creating realistic AI images, don’t be afraid to include details like:
- Slightly messy hair
- Natural skin texture
- Small wrinkles in clothing
- Light shadows under the eyes
- Background blur
- Imperfect weather conditions
These tiny flaws often make the biggest difference.
It also helps to specify the camera angle and mood. A close-up portrait feels different from a wide-angle street photo. A happy family picnic creates a different feeling than a quiet person sitting alone in a café during rain.
One thing I avoid is using words like “perfect,” “flawless,” or “ideal.” AI tends to exaggerate those descriptions, and the results can end up looking more like a video game character than a real person.
If you’re wondering how to create realistic AI images, think less about creating perfection and more about capturing a real moment. The best AI photos often feel like they were taken by an actual photographer who happened to be in the right place at the right time.
That’s usually when the magic happens.
9. How to Edit or Improve AI Generated Images
Creating an AI image is only half the job. The real magic often happens after the image is generated.
I’ve noticed that even the best AI tools sometimes make strange mistakes. You ask for a person holding a coffee cup, and somehow they end up with six fingers. Or the face looks great, but the background feels weird. It happens more often than you’d think.
The good news? Most of these problems are easy to fix.
One of the simplest ways to edit AI generated images is to regenerate specific parts instead of starting over. Many AI tools now offer something called inpainting. It sounds technical, but it’s actually pretty simple. You select the area you don’t like—maybe a hand, face, or object—and tell the AI what to replace it with. The rest of the image stays the same.
This works really well when you’re trying to fix hands, facial details, clothing, or random objects that don’t belong in the scene.
Another useful trick is using a reference image. If you’re wondering how to use a reference image in an AI generator, think of it like showing an example to a friend. Instead of describing everything with words, you upload a photo and let the AI learn from its style, colors, pose, or composition. I’ve found this especially helpful when creating blog images, product photos, or social media graphics that need a consistent look.
Sometimes the image isn’t bad at all. It’s just not quite right.
That’s where image to image AI tools can help. You upload an existing image and ask the AI to create new versions based on it. Maybe you want a different background, a new art style, or better lighting. The AI keeps the general idea while giving you fresh options to choose from.
Speaking of backgrounds, yes, you can absolutely change the background in an AI image. Most modern AI image editing tools allow you to remove, replace, blur, or completely redesign the background. A plain wall can become a beach, a city street, or even a mountain landscape in seconds.
Don’t forget basic edits, either. Sometimes a simple crop or resize can make an image look much more professional. I do this all the time when creating blog featured images and social media posts.
One small tip that saves a lot of frustration: if the AI creates text inside an image, don’t expect perfection. AI still struggles with letters and words. Instead of fighting with it, generate the image without text and add your headline later using Canva or Photoshop. It’s usually faster and the final result looks cleaner.
When you refine an AI image, think of it like editing a rough draft. The first version rarely ends up being the final one. Make small changes, test different versions, and keep improving little by little. That’s usually where the best images come from.
Read More: How to Download Your Voter ID Card?
10. Common Mistakes Beginners Make
When people first start creating AI images, they usually think the tool will magically read their mind. I thought the same thing the first time I tried it. I typed something like, “Create a beautiful house,” and the result looked nothing like the picture I had in my head. That’s when I realized AI needs clear instructions.
One of the biggest AI prompt mistakes is being too vague. If you simply ask for “a dog in a park,” the AI has to guess everything else. What kind of dog? What season? What style? A photo or a cartoon? The more details you give, the better the result usually becomes.
Another common problem is asking for too many things at once. I’ve seen prompts that try to include ten people, three animals, a castle, a spaceship, fireworks, mountains, and a sunset all in a single image. The AI often gets confused and creates messy or strange results. Keeping things simple usually works much better.
A lot of beginners also forget to choose the right aspect ratio. An image made for Instagram looks different from one made for a YouTube thumbnail or blog banner. If you skip this step, you may end up cropping important parts of your image later.
Lighting and composition matter too. Many bad AI images happen because people focus only on the subject and ignore how the scene should look. Try adding details like “golden sunset lighting,” “soft natural light,” or “close-up view.” Small changes can make a huge difference.
Then there’s the famous weird hands problem. If you’ve ever searched “Why does AI create weird hands?” you’re not alone. AI has improved a lot, but hands, fingers, and tiny details can still look odd sometimes. The same thing happens with text. Many people wonder, “Why is text wrong in AI images?” The truth is that AI image generators are better at creating pictures than spelling words perfectly. I usually add text later using a design tool if it needs to look professional.
One mistake that doesn’t get talked about enough is copyright. Before using AI-generated images for a blog, business, or product, check the tool’s commercial-use rules. Also, be careful when trying to copy a celebrity’s face or a famous artist’s exact style. It can create legal and ethical problems you probably don’t want to deal with.
If you’re wondering, “Why is my AI image not accurate?” or “How to improve AI image quality?” the answer is often surprisingly simple: write clearer prompts, keep your ideas focused, pay attention to image settings, and don’t be afraid to generate a few versions before picking the best one. Most great AI images come from a little trial and error, not from the first prompt.
11. Can You Use AI Images Commercially?
This is one of the first questions people ask after creating an AI image.
You spend a few minutes typing a prompt, the AI creates something amazing, and then you start wondering, “Can I actually use this on my blog, website, YouTube channel, or business?”
The short answer is: usually yes, but it depends on the tool you used.
Every AI image generator has its own rules. Some tools allow full commercial use, while others have restrictions based on your subscription plan. That’s why I always recommend checking the license page before using an image in a business project. It only takes a few minutes, and honestly, it can save a lot of headaches later.
Another thing people often overlook is AI image copyright. The rules are still changing in many countries. In some places, AI-generated images may not receive the same copyright protection as artwork created entirely by a human. That’s why it’s smart to stay updated and understand the policies of the platform you’re using.
I’ve also noticed that some users try to copy the exact style of living artists. Personally, I’d avoid doing that. Using an artist’s work as inspiration is one thing. Trying to recreate their unique style so closely that people confuse it with their work is another. It can create legal and ethical problems that simply aren’t worth the risk.
The same goes for fake documents, misleading news photos, or images that pretend to show real people doing things they never did. AI is powerful, and that’s exactly why it should be used responsibly. Creating a fake government document, a fake celebrity image, or a fake news photo might get attention for a moment, but it can damage trust very quickly.
So, can I use AI images for business? In many cases, yes. Businesses use AI images for blog posts, social media graphics, advertisements, presentations, website banners, and product mockups every day. Just make sure the images follow the platform’s license and don’t violate anyone’s rights.
One last tip. If an image was heavily created or altered using AI, consider adding a simple disclosure when appropriate. You don’t need a giant warning label. A small note can help build trust with your audience, especially when the image might be mistaken for a real photograph.
At the end of the day, AI images can be a fantastic tool for creators and businesses. Just use them with common sense, respect other people’s work, and double-check the rules before hitting publish.
12. Best Use Cases for AI Images
When most people hear about AI image generators, they think about creating cool artwork or funny pictures. I thought the same thing at first. Then I realized these tools can save a lot of time for bloggers, business owners, students, and content creators.
One of the most common uses is creating AI images for blog posts. If you’ve ever spent twenty minutes searching for the perfect stock photo and still couldn’t find one, you know the struggle. With AI, you can describe exactly what you need. Maybe it’s a small business owner working late at night or a student studying with a laptop in a coffee shop. The image is created in seconds, and it feels much more unique than a stock photo.
Another popular use is making AI thumbnails for YouTube videos. Thumbnails can make a huge difference in click-through rates. Instead of using generic images, creators can generate custom visuals that match their video’s topic. A travel vlogger, for example, can create a dramatic mountain scene or a colorful city background without leaving their desk.
Social media creators are using AI images for social media every day. Instagram posts, stories, Facebook ads, and even profile graphics can be designed quickly. I’ve seen small businesses create professional-looking promotional posts without hiring a designer. That’s a big win when you’re working with a tight budget.
Pinterest is another great place for AI-generated visuals. Bright and eye-catching pins often get more attention. Whether you’re sharing recipes, blogging tips, fitness ideas, or home decor inspiration, custom AI images can help your content stand out in a crowded feed.
Businesses are also creating AI product images and product mockups. Imagine selling a coffee mug online. Instead of organizing a photo shoot, you can generate images showing the mug on a desk, in a kitchen, or as a gift item. It saves both money and effort.
The uses don’t stop there. AI images work well for website banners, book covers, posters, festival greetings, online advertisements, and presentations. A friend of mine recently created a birthday event poster with AI in less than ten minutes. A task that once required design software and hours of editing became surprisingly simple.
At the end of the day, AI image tools are really about speed and creativity. They won’t replace good ideas, but they can help bring those ideas to life much faster. And honestly, that’s what makes them so useful.
13. Quick Checklist Before Publishing AI Images
I learned this the hard way. The first time I used an AI-generated image on a blog post, I was so excited that I uploaded it without checking anything. Later, I noticed the person’s hand looked strange, the image loaded slowly, and the file name was something random like “image12345.png.” Not exactly my finest moment.
Before you hit publish, take a minute and run through this quick checklist:
✔ Is the image clear? Zoom in and look closely. Blurry images can make even a great article feel low quality.
✔ Does the face and body look natural? AI still makes odd mistakes sometimes. Extra fingers, twisted arms, or strange eyes can sneak into the final image.
✔ Is all text correct? AI often struggles with text inside images. Double-check every word.
✔ Is the image size right? A huge file can slow down your page. Nobody likes waiting for images to load.
✔ Did you compress the file? Smaller files usually mean faster websites, which is good for both visitors and search engines.
✔ Does the image actually match your content? A beautiful image is useless if it confuses readers.
✔ Are you allowed to use it? Always review the tool’s licensing rules before using AI images for commercial projects.
✔ Did you add image alt text? Good image alt text helps search engines understand the image and improves accessibility.
✔ Is the image file name SEO-friendly? Instead of “IMG001.webp,” use something descriptive like “how-to-create-ai-images-guide.webp.”
Honestly, this little two-minute check can save you from embarrassing mistakes and improve your AI image SEO, blog image optimization, and overall user experience at the same time.
14. FAQs
1. How do I create AI images for free?
Creating AI images for free is actually easier than most people think. Many AI image generators offer free plans that let you create a certain number of images every day or month. All you need to do is open the tool, type a description of what you want, and click the generate button.
For example, you could type something like, “A small coffee shop on a rainy evening, warm lights, realistic photo.” Within seconds, the AI creates images based on your description.
If you’re just getting started, don’t worry about writing perfect prompts. I made plenty of terrible prompts when I first tried AI image generators, and honestly, that’s part of the learning process.
2. What is the best AI image generator for beginners?
For most beginners, simplicity matters more than advanced features.
If you want something easy to use, ChatGPT, Canva AI, and Adobe Firefly are good places to start. Their interfaces are clean, and you don’t need any design experience.
Personally, I think beginners often get overwhelmed when a tool offers hundreds of settings. At the beginning, it’s better to focus on learning how prompts work rather than spending hours adjusting technical options.
Choose a tool that feels comfortable. You can always try more advanced platforms later.
3. Can ChatGPT create AI images?
Yes, ChatGPT can create AI images.
You simply describe what you want to see, and ChatGPT can generate images based on your instructions. You can also ask it to make changes afterward.
For example, if you create a picture of a beach sunset but want more palm trees or brighter colors, you can just tell ChatGPT what to change.
That back-and-forth conversation feels surprisingly natural. It’s almost like working with a designer who never gets tired of revisions.
4. How do I write a good AI image prompt?
A good prompt is clear and specific.
Instead of writing:
“Create a dog.”
Try something like:
“A happy golden retriever running through a green park during sunset, realistic photography style.”
Notice how the second example gives the AI more details to work with.
A simple formula that works well is:
Subject + Location + Style + Lighting + Mood
The more useful details you provide, the better the results usually become. Just don’t overload the prompt with twenty different ideas at once. AI gets confused too.
5. Can I create AI images from my own photo?
Yes, many AI tools allow you to upload your own photo and transform it.
You can turn a normal selfie into a cartoon, painting, sketch, fantasy character, or even a professional-looking portrait.
I’ve seen people use old family photos and convert them into beautiful artwork. Some results are amazing. Others can be a little strange. Sometimes the AI decides your ear belongs somewhere near your forehead. It happens.
That’s why it’s always worth checking the final image carefully.
6. Are AI images copyright free?
This question doesn’t have one simple answer.
The rules depend on the AI tool you’re using. Some platforms allow commercial use, while others have restrictions.
Before using AI images for business, marketing, or products you’re selling, check the tool’s licensing terms.
A few minutes spent reading the rules can save you a lot of trouble later. It’s not the most exciting part of creating images, but it’s definitely worth doing.
7. Can I use AI images on my blog or YouTube channel?
In many cases, yes.
Many content creators use AI-generated images for blog posts, YouTube thumbnails, social media graphics, presentations, and websites.
The key thing is making sure the AI tool allows commercial use if your content generates income.
Also, try to use AI images responsibly. Avoid misleading people with fake news images or edited photos that could cause confusion.
For normal blog and YouTube content, AI images can save a huge amount of time.
8. Why do AI images look weird sometimes?
If you’ve ever seen an AI image with six fingers or eyes looking in different directions, you’re not alone.
AI image generators are incredibly smart, but they’re not perfect.
They sometimes struggle with hands, text, jewelry, reflections, and small details. That’s where weird-looking results usually appear.
The good news is that newer AI models are getting much better every year. Still, I always zoom in before downloading an image. You’d be surprised how many odd little mistakes hide in the corners.
9. How do I make AI images look realistic?
The easiest way is to describe your image like a photographer would.
Mention things like natural lighting, camera angles, facial expressions, and realistic backgrounds.
Instead of saying:
“Create a man.”
Try:
“A middle-aged man sitting in a small café, natural window light, realistic photography, detailed skin texture.”
Small details make a big difference.
Another trick is adding a few imperfections. Real life isn’t perfectly polished, and realistic AI images often look better when they include natural flaws.
10. Which AI image size is best for social media?
The best image size depends on where you’re posting it.
For Instagram posts, square images often work well.
For YouTube thumbnails, a wide format is usually the better choice.
For TikTok, Instagram Reels, and YouTube Shorts, vertical images fit the screen naturally.
If you’re not sure, check the platform’s recommended image dimensions before generating the image. Doing that first can save you from cropping important parts later.
Trust me, there’s nothing more annoying than creating the perfect image and then realizing someone’s face gets cut off when you upload it.
15. Conclusion
Creating AI images is honestly much easier than most people think. You don’t need to be a designer, artist, or tech expert. The basic process is simple: pick an AI image tool, write a clear prompt, generate an image, and then keep improving it until it looks the way you want.
One thing I’ve noticed is that the quality of the result usually comes down to the prompt. A vague prompt often gives a random-looking image. A detailed prompt with a clear subject, style, mood, and setting usually produces something much better. Small changes can make a surprisingly big difference.
Don’t worry if your first image looks strange. That happens to almost everyone. AI image creation is a bit like learning to cook a new recipe. The first attempt might not be perfect, but each adjustment teaches you something.
So here’s a simple challenge. Open your favorite AI image generator today and try creating one image from a text prompt. Then refine that same prompt two or three times and compare the results. You might be surprised by how quickly your images improve. The best way to learn is by experimenting and having fun with it.

Leave a Reply