You verified your website, submitted the sitemap, and opened the reports, but some charts still look blank or hard to understand. Your Google Search Console SEO audit should now show whether Google can find, crawl, index, and rank your key pages.
Google Search Console shows how Google sees your website: it reports known URLs, search queries, clicks, impressions, indexing status, and page issues. The Page Indexing report shows the status of URLs Google knows about, while URL Inspection checks whether one page may be indexed.
In this guide, you will follow a clear order:
- Check security and manual actions.
- Review your sitemap and indexed pages.
- Find crawl, canonical, and
noindexissues. - Audit search performance and page experience.
- Review structured data and links.
Search Console is free, but it does not replace Google Analytics or a full website crawler. Google recommends using Search Console and Analytics together for a fuller view of how people find and use your website.
A Google Search Console SEO audit checks whether Google can crawl and index your important pages, how they perform in Search, and which technical or user-experience issues need your attention first.
What Is a Google Search Console SEO Audit?
A Google Search Console SEO audit is a check of how Google sees, crawls, indexes, and shows your website. You use real Google data to find problems, set priorities, and improve your search results.
Google Search Console is a free tool from Google for website owners, bloggers, developers, online stores, and SEO teams. It shows which search words bring people to your site, along with clicks, views, and average search position.
Monitoring Is Not the Same as Auditing
Monitoring means you watch your numbers change over time. Auditing means you ask why they changed, find the cause, and choose what to fix first.
For example: a drop in clicks is only a signal. A GSC audit checks whether the cause is lost rankings, indexing trouble, weak page titles, security issues, or lower search demand.
What Can GSC Check?
A website audit using Search Console can help you review:
- Search clicks, views, keywords, and page positions.
- Pages that Google found, indexed, or failed to index.
- Live URL access and indexability.
- Core Web Vitals based on real user data.
- HTTPS use and structured-data reports.
- Internal and external links reported by Google.
- Manual actions, hacked pages, malware, and security warnings.
Still, GSC is not a full website crawler, competitor research tool, or sales tracking platform. Your Google Search Console SEO audit should guide your next action, while tools such as GA4 and a site crawler provide the missing details.
Before the Audit: Confirm You Are Looking at the Right Property
Before you start your Google Search Console property setup audit, check the property name at the top of the screen. The wrong property can hide valid pages, clicks, indexing data, and sitemap reports.
First of all, Add your Property(Blog/Website) to Google Search Console:
1. Go to Google search Console and Log in with your Google or Gmail Account.
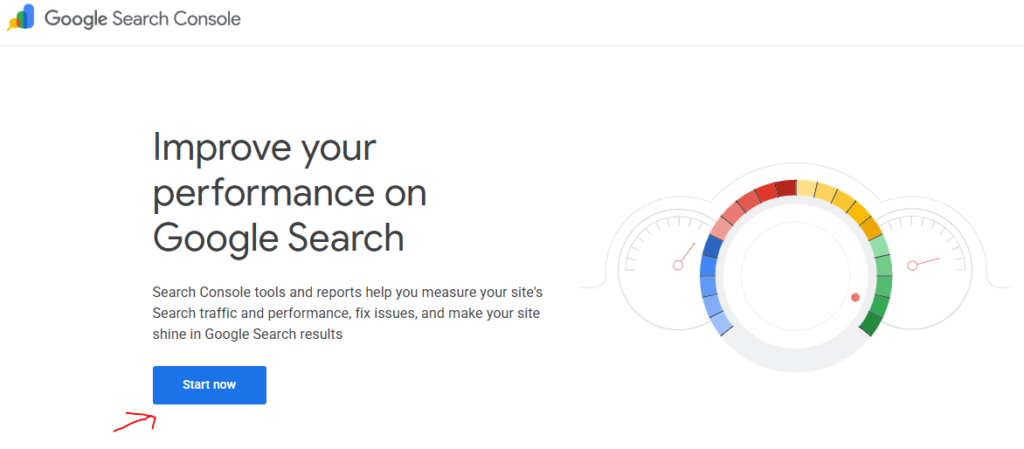
2. Now, click on start Now Button.
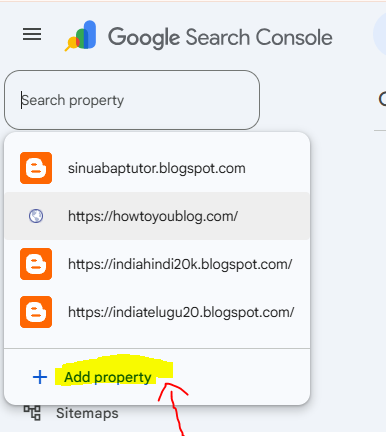
3. Open the property selector dropdown in any Search Console page, Select + Add property on the dropdown.
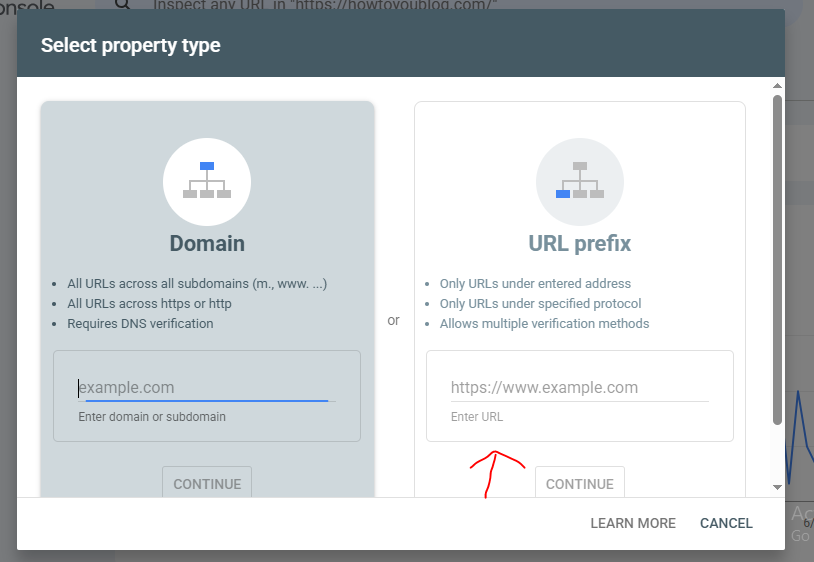
4. You choose between:
Domain Property (recommended)
URL-prefix Property
Google recommends Domain Property because it includes all subdomains (www, blog, etc.) and both HTTP and HTTPS versions. Here, enter URL prefix and click on enter.
5. Available verification methods include:
HTML file upload
HTML meta tag
Google Analytics
Google Tag Manager
DNS TXT record (required for Domain properties)
Google’s official documentation explains when each method should be used. Here I selected HTML Tag, Copy it and Paste it before the header of your own site, and save. Now in GSC, click on verify.
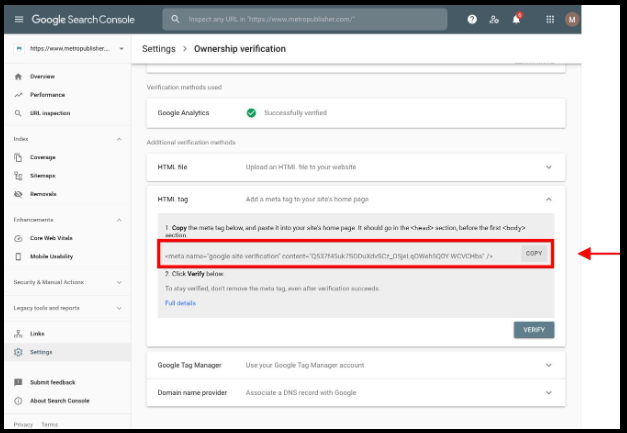
6. When verification succeeds, you’ll see a confirmation that the property has been verified and Google will begin collecting search data for your website.
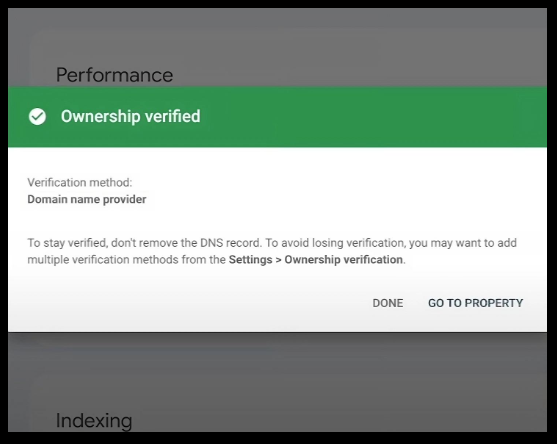
Thus, You can set up Your Property in GSC. And, Performance reports may take 24–48 hours, and sometimes longer for a brand-new website, before meaningful data appears.
Choose the Right Search Console Property
A Domain property gives you the full view of your website. It includes HTTP, HTTPS, www, non-www, and all subdomains under the domain.
For example, a property named example.com can include https://example.com, https://www.example.com, and https://shop.example.com. Google normally recommends this option when you can verify the domain through a DNS record.
A URL-prefix property tracks only URLs that begin with the exact address you added. Therefore, https://www.example.com/ will not include http://example.com/ or another subdomain.
Use a URL-prefix property when you need to audit one protocol, subdomain, or folder. Otherwise, pages may look missing because you are checking only one version of your site.
Run This Quick GSC Verification Audit
- Select the correct domain.
- Confirm that you are a verified owner or approved user.
- Open your live HTTPS website.
- Check that HTTP redirects to HTTPS.
- Check that
wwwredirects to your chosen hostname, or the reverse. - Confirm that the submitted sitemap uses your live URLs.
- Make sure you did not select a test or staging property.
- Record the launch, sitemap submission, and audit dates.
Do these checks before reading any SEO report. A correct Search Console property gives you a clean and reliable starting point for your audit.
The Correct Order for a New-Website GSC Audit
A new-website GSC audit should start with serious risks, not clicks or keyword ranks. This order helps you fix problems that may stop your whole site from appearing on Google.
Follow This GSC Audit Order
- Check Security Issues for malware, hacked pages, or harmful files.
- Check Manual Actions, as Google may remove or lower affected pages.
- Test whether Google can open your site without a robots block,
noindextag, or server error. - Check your XML sitemap and make sure it lists the right URLs.
- Open Page Indexing to see which pages Google knows and indexes.
- Inspect your homepage and key pages with URL Inspection.
- Review Core Web Vitals and HTTPS issues.
- Fix structured-data errors.
- Study clicks, views, CTR, and search position.
- Review internal and external links.
- Turn each finding into a clear action.
Use This Priority Scale
| Priority | What It Means | Example |
|---|---|---|
| P0 | Fix now | Hacked content or manual action |
| P1 | Indexing blocker | noindex, robots block, or server failure |
| P2 | Technical issue | Wrong canonical, redirect, or sitemap URL |
| P3 | Growth chance | Low CTR or keywords in positions 8–20 |
| P4 | Watch only | Normal exclusion or too little data |
Always complete your new-website GSC audit in this order: fix danger first, indexing second, and growth issues last.
Step 1: Check Security Issues and Manual Actions First
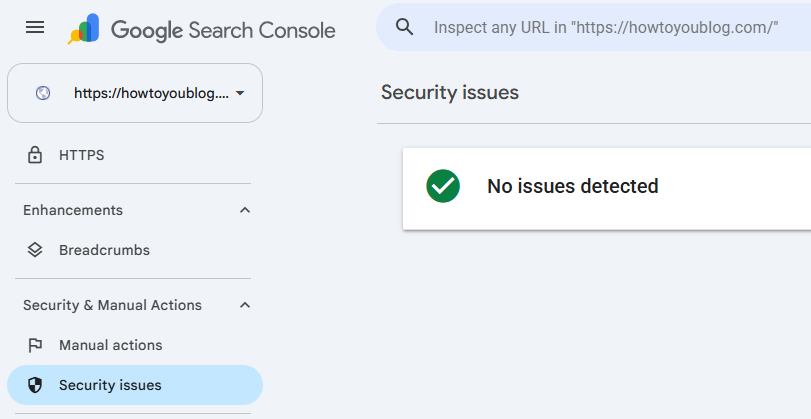
Start your Google Search Console security issues check before you study clicks, keywords, or rankings. A hacked site or manual action can harm your whole site, so small SEO changes will not solve the main problem.
Check the Two Main Reports
Open Google Search Console, then go to Security & Manual Actions in the left menu. Check these areas:
- Security Issues: Shows malware, hacked pages, phishing, or harmful downloads.
- Manual Actions: Shows action taken by Google’s review team.
- Messages: Shows key alerts, warnings, and review updates.
A security warning may show visitors a warning page before they enter your site. This can cause a sharp fall in search visits.
Know What Type of Problem You Have
A manual action means a human reviewer found that some pages or your whole site broke Google’s spam rules. An algorithm change is different: it can lower rankings, but it will not appear inside the Manual Actions report.
A new website can also receive a manual action if it uses copied content, hidden text, spam links, or misleading pages. Still, never call every traffic drop a Google penalty.
What to Do When You Find an Issue
First, open the report and note every affected URL. Then remove hacked content, fix the weak plugin or password, test the pages, and record each change.
Submit a review request only after you fix every listed problem. Google asks you to explain the issue, your fixes, and the final result.
Finish this Google Search Console security issues check before doing keyword work. You can now confirm that no major trust or safety issue is blocking your SEO progress.
Step 2: Audit Your XML Sitemap
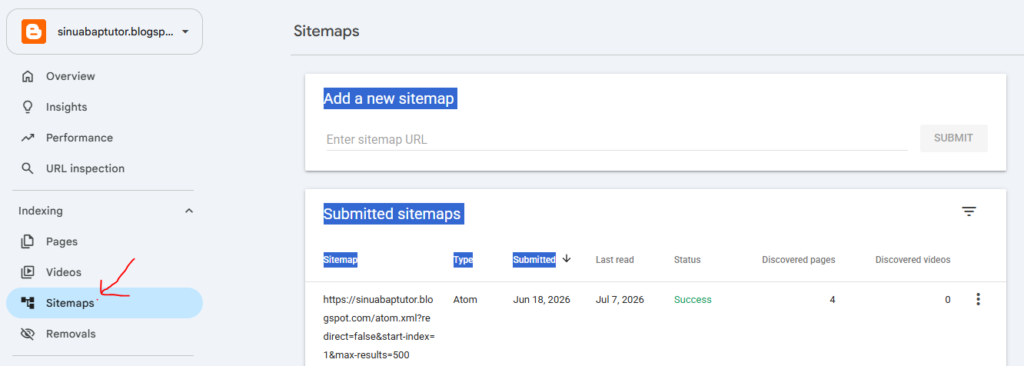
A Google Search Console sitemap audit shows whether Google can read your sitemap and find its URLs. Open Indexing → Sitemaps, then check the status, last-read date, and discovered-page count.
What Does “Success” Mean?
A Success status means Google fetched and processed the sitemap without a major file error. It does not mean Google crawled, indexed, or ranked every listed page.
Next, compare these three numbers:
- URLs found in the sitemap.
- Important pages that you want Google to index.
- Pages shown as indexed in the Page indexing report.
A gap between these numbers helps you find the real problem. For example, a sitemap may list 20 URLs while Google has indexed only three.
Check Every URL Type
Your XML sitemap should act like a clean guest list: each URL must deserve entry into Google Search. Include only pages that meet these rules:
- The URL returns a
200success status. - The page allows indexing.
- The URL is the main canonical version.
- The page offers useful content.
- You want the page shown in search results.
Remove redirected URLs, broken 404 pages, noindex pages, test-site URLs, and duplicate parameter URLs. Also remove thin tag or category pages unless they help users and target a clear search need.
Check the lastmod Date
Use lastmod only when you make a real page change, such as updating text, prices, images, or key facts. Do not change this date each day when the page content stays the same.
Sitemap Submitted but Not Indexed?
A sitemap helps Google discover pages, but it cannot force Google to crawl or index them. Repeatedly submitting the same unchanged sitemap will not fix weak content, blocked crawling, poor internal links, or the wrong canonical URL.
One sitemap can contain up to 50,000 URLs or reach 50 MB uncompressed. Use several sitemaps and a sitemap index when your site passes either limit.
Practical Example
Your sitemap reports Success, yet only three of 20 pages appear in Google. You then find ten discovered pages, four redirects, three duplicate category pages, and three indexed pages.
Remove the seven unsuitable URLs, add internal links to the ten useful pages, and inspect those pages in Search Console. Your Google Search Console sitemap audit now focuses on real indexing problems, not harmless sitemap noise.
Step 3: Audit the Page Indexing Report Without Treating Every Exclusion as an Error
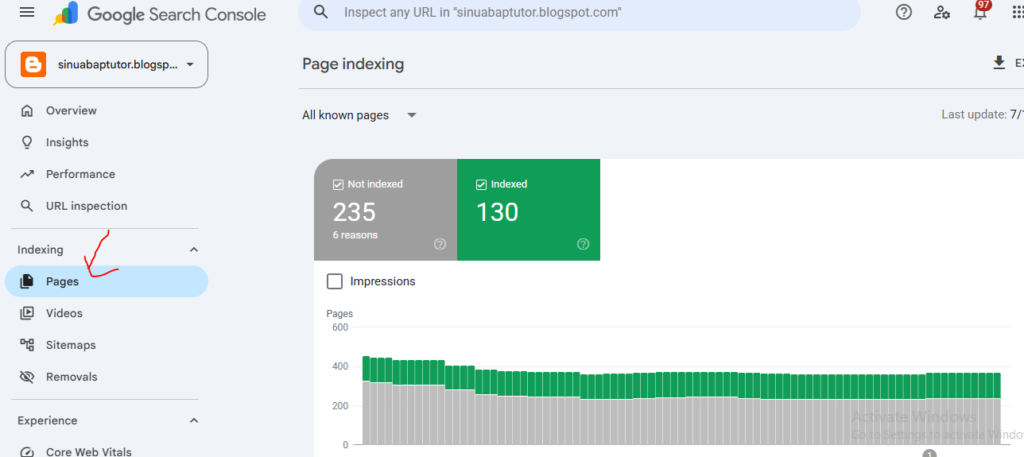
A Google Search Console page indexing audit helps you see which pages Google has indexed and why it skipped other pages. Your goal is not to make every URL green; your goal is to index each page that matters.
Open Indexing → Pages in Google Search Console. Then review the “Indexed” and “Not indexed” groups instead of looking only at the total error count.
Compare Indexed Pages With Pages That Should Be Indexed
First, create an indexable target count: the number of pages you truly want people to find on Google. Count your blog posts, service pages, product pages, category hubs and key landing pages.
Do not compare your indexed count with every URL your website creates. Many sites produce tags, filters, login pages, search pages, feeds, archives and duplicate URLs that do not need indexing.
For example, your new blog may create 120 URLs, but only 35 may hold useful public content. In that case, 35 indexed pages can be better than forcing all 120 URLs into Google.
Separate your URLs into these two groups:
- Should be indexed: useful posts, products, services and landing pages.
- Should stay out: account pages, internal search results, empty tags, filters and duplicates.
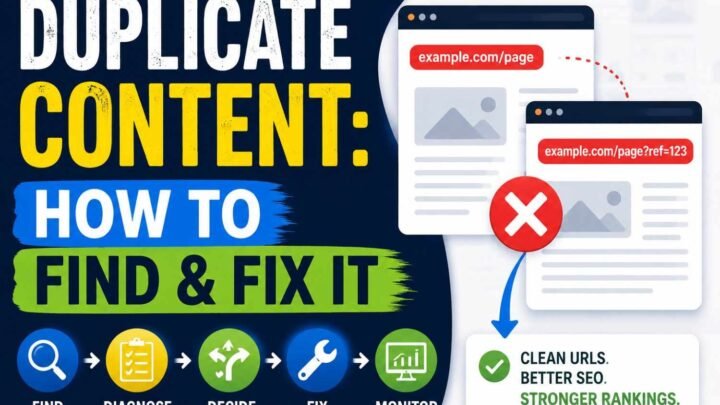
Google says your main aim is to index the canonical version of each important page. Duplicate and alternate URLs often do not need indexing when Google has indexed the correct canonical page.
Fix the Highest-Risk Indexing Reasons First
Do not fix issues in random order. Start with problems that stop Google from opening or reading important pages.
Use this order:
- Server error, or 5xx: your hosting failed when Googlebot visited.
- Blocked by robots.txt: a rule stopped Googlebot from crawling the URL.
- Excluded by noindex: the page tells Google not to index it.
- Unauthorized or forbidden: Google received a 401 or 403 response.
- Redirect error: the redirect chain failed, looped or became too long.
- Not found, or 404: the URL does not exist.
- Soft 404: the page loads, but it looks empty, missing or useless.
- Canonical issues: Google sees the URL as a copy of another page.
- Discovered—not indexed: Google knows the URL but has not crawled it.
- Crawled—not indexed: Google crawled the page but chose not to index it.
A noindex tag blocks a page from Google Search, so remove it only when you added it by mistake.
Know When an Exclusion Is Normal
An excluded URL is not always a Google Search Console indexing error. Some exclusions show that your site setup works as planned.
You can usually leave these URLs alone:
- A redirected URL that leads to the right page.
- An alternate URL with the correct canonical.
- A page with an intentional
noindextag. - A duplicate page whose main version is indexed.
- A deleted URL that returns a true 404 or 410 status.
For example, an old post URL may redirect to its new address. Google should index the new address, not both versions.
Diagnose “Discovered—Currently Not Indexed”
This status means Google found the URL but has not crawled it yet. It often appears on new sites, large sites or sites with weak internal links.
Check whether the page:
- Has a link from an indexed page.
- Appears in your XML sitemap.
- Loads fast and returns a 200 status.
- Sits more than three clicks from your homepage.
- Repeats content found on other pages.
- Belongs to a large group of weak tags or filters.
A sitemap or indexing request cannot force Google to index a page. Google says crawling may take from a few days to a few weeks, and a crawl request does not guarantee indexing.
Improve the page, add clear internal links and wait before sending the same request again. Google does not promise to crawl or index every valid page.
Diagnose “Crawled—Currently Not Indexed”
This status means Googlebot reached the page, but Google did not add it to its search index. The problem may involve quality, duplication, page purpose or a weak canonical setup.
Ask these practical questions:
- Does this page answer a unique search need?
- Does another page cover the same topic?
- Is most of the page copied from a common template?
- Can Google see the main text after rendering?
- Does the page have useful internal links?
- Does its canonical point to the correct URL?
- Is it a thin tag, city or service page?
- Does it repeat generic or automated text?
Do not add random words just to make the page longer. Merge duplicate pages, improve the core answer or remove pages that do not serve a clear purpose.
| Indexing status | What should you do? | First action |
|---|---|---|
| Blocked by robots.txt | Fix if the page matters | Review the blocking rule |
| Excluded by noindex | Fix if it was accidental | Remove the directive |
| Alternate with canonical | Usually leave it | Check the chosen canonical |
| Page with redirect | Usually leave it | Test the final page |
| Soft 404 | Investigate | Add value or return 404 |
| Discovered, not indexed | Investigate | Improve links and page quality |
| Crawled, not indexed | Investigate deeply | Check uniqueness and canonical |
| Server error | Fix at once | Check hosting and server logs |
Finish your Google Search Console page indexing audit with a short action list: fix blocked pages, inspect weak pages and leave valid exclusions alone. This approach saves time and keeps your attention on the URLs that can bring real search traffic.
Step 4: Inspect Your Most Important URLs Individually
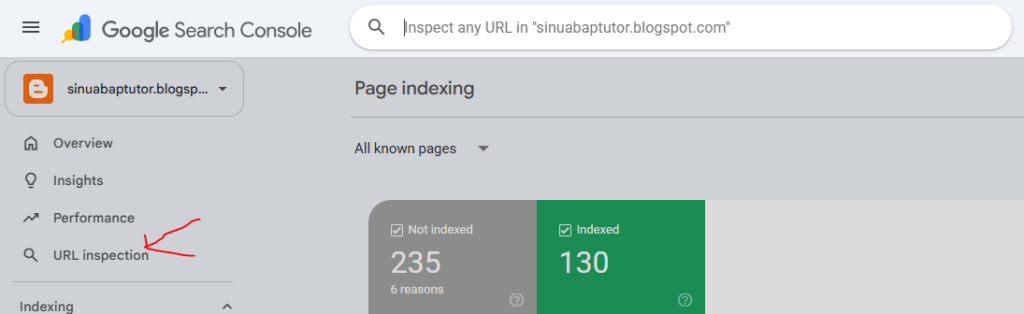
The Google Search Console URL Inspection tool shows what Google knows about one page. Use it to check a page, test the live URL, and find indexing problems.
Do not inspect every URL at once. Start with the pages that matter most to your visitors and business.
Which URLs Should You Inspect?
Check these pages first:
- Your homepage.
- Main service or category pages.
- Your About page.
- Your best cornerstone article.
- A new blog post.
- One indexed page.
- One unindexed page.
For a small new website, checking five to seven pages is a good first test. This sample often shows whether the problem affects one page or the whole site.
What Should You Check?
Paste the full URL into the inspection bar at the top of Search Console. Then review these details:
- Is the URL on Google?
- Can Google crawl the page?
- Is indexing allowed?
- When did Google last crawl it?
- Did Googlebot crawl it as a smartphone?
- Did the page return a valid HTTP response?
- What canonical URL did you declare?
- Which canonical URL did Google select?
- Is the URL present in a sitemap?
- Did Google find any referring pages?
- Can Google load the page resources?
- Is the structured data valid?
Pay close attention to the two canonical URLs. When they differ, Google may index another version instead of the page you entered.
Indexed URL vs Test Live URL
The indexed result shows the page version Google last saved. It may still show an old title, old content, or an earlier error.
The Test Live URL option checks the page as it works now. It helps you confirm whether Google can access the current page after you make a fix.
A passed live test does not mean the page is already indexed. It only means the live version appears available for Google to crawl.
For example, you may remove a noindex tag today. The live test may pass, while the indexed result still shows the old blocked version.
When Should You Request Indexing?
Use Request Indexing after:
- Publishing an important new page.
- Making a major update to a key article.
- Removing an accidental
noindextag. - Fixing a crawl, server, or canonical problem.
- Restoring a page that returned an error.
Request indexing once, and then watch the page status. Repeating the request each day does not force Google to index the URL faster.
Google says crawling can take from a few days to a few weeks. It also states that a request does not guarantee crawling, indexing, or a place in search results.
Your Google Search Console URL Inspection result should guide your next step: fix access problems first, confirm the live page, and then request indexing only when the page is ready.
Step 5: Audit Robots.txt, Noindex, and Canonicals Together
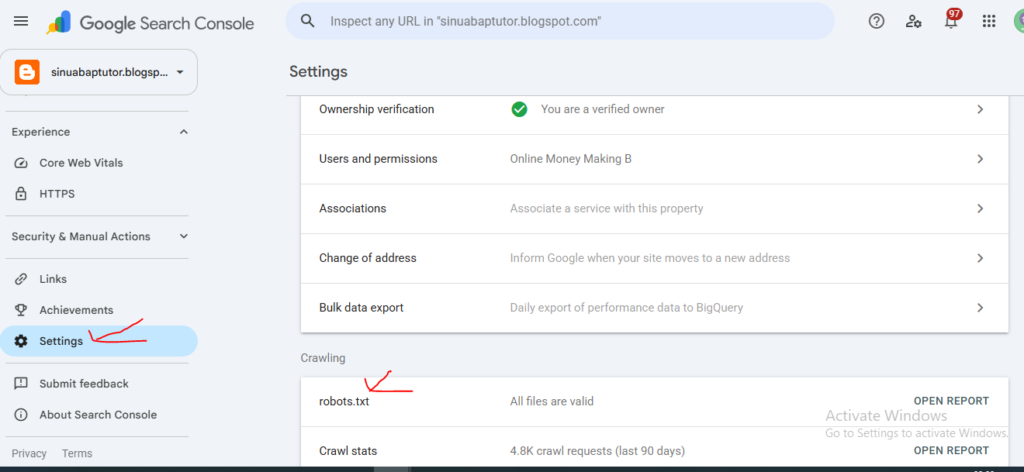
A robots.txt audit in Google Search Console helps you find rules that send mixed signals to Google. Check robots.txt, noindex, and canonical tags together because each one serves a different job.
Know What Each Rule Does
Your robots.txt file tells Googlebot which URLs it may crawl. Google says this file mainly controls crawler access; it does not reliably keep a page out of Google Search.
A noindex tag tells Google not to place a page in its search index. Google must crawl the page first, or it cannot read that rule.
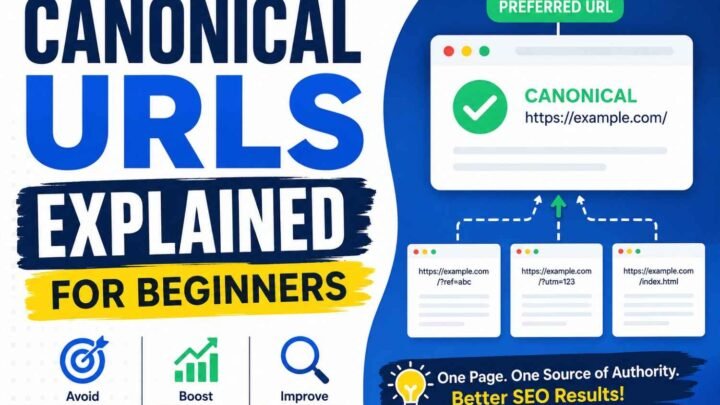
A canonical tag points Google toward your preferred URL when two or more pages have the same content. Google may still choose another URL because a canonical tag is a hint, not a firm order.
Never Block a Page That Has Noindex
A risky setup looks like this: you block a URL in robots.txt and also add noindex. Googlebot cannot open the page, so it may never see the noindex tag.
The blocked URL may still appear in Search when another site links to it. Google may show only the URL because it cannot crawl the page content.
Use noindex when you want Google to remove a public page from Search. Do not place a noindex rule inside robots.txt because Google does not support that method.
Check Every Canonical Signal
Open URL Inspection and compare the user-declared canonical with the Google-selected canonical. Then check whether every other signal points to that same preferred URL.
Audit these items:
- The canonical tag in the HTML.
- The URL listed in your XML sitemap.
- Internal links across your website.
- HTTP-to-HTTPS redirects.
wwwand non-wwwredirects.- Redirect chains and final URLs.
For example, your sitemap may list http://example.com/page, while your canonical points to https://www.example.com/page. This conflict makes Google choose between signals instead of following one clear path.
The same issue appears with tracking parameters, print pages, tag archives, and ecommerce filters. Link to the clean URL, place it in your sitemap, and use that same URL as the canonical.
Test the Fix
Inspect one affected URL and run Test Live URL. Confirm that crawling is allowed, indexing matches your goal, and Google can read the canonical tag.
My rule is simple: do not use three controls when one clear control will work. A clean robots.txt audit in Google Search Console should leave Google with one crawl rule, one index choice, and one preferred URL.
Step 6: Audit Search Performance—Clicks, Impressions, CTR and Position
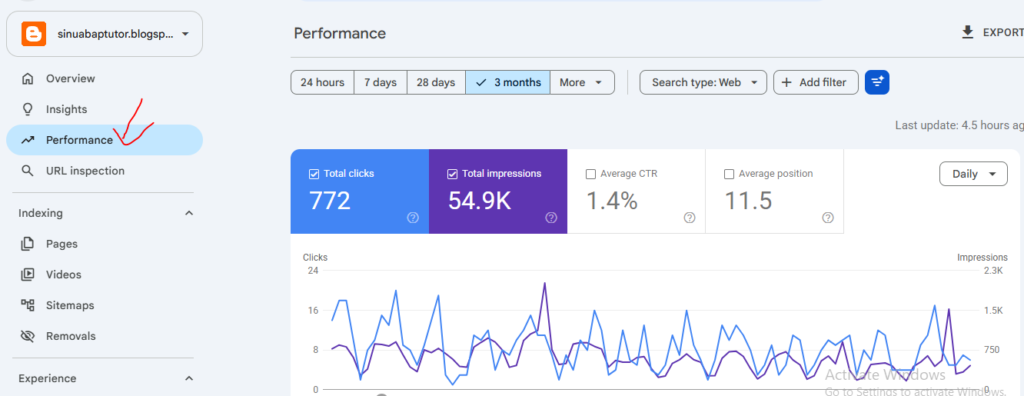
A Google Search Console performance audit shows how people find your website in Google. It also shows which pages need better titles, content, links or search intent.
Open Search Console → Performance → Search results. Turn on clicks, impressions, average CTR and average position before you review the data.
Set the Right Date Range
For a new website, start with the last 28 days. This period gives you a clear view without too much daily noise.
Once your site has enough data, compare the last 28 days with the prior 28 days. For a seasonal site, compare the same months or weeks from each year.
Use up to 16 months of data when you need to check seasonal changes. Google also suggests comparing similar periods when you study a traffic drop.
Keep notes about key changes, such as:
- Website launch dates.
- New page dates.
- Site moves.
- Title changes.
- Major content updates.
- Google algorithm updates.
This step stops you from guessing. For example, a traffic dip after a URL change may point to a site issue, not weak content.
Segment the Data Before You Judge It
Do not judge your whole website from one chart. Filter the Google Search Console performance report by query, page, country, device, search type, search appearance or date.
Google lets you use more than one filter at a time. For example, you can view mobile searches from India for one blog page.
You can also split branded and non-branded searches when this filter appears in your account. Branded searches often get a higher CTR, while non-branded searches show how new readers find you.
Understand the Four Main Metrics
| Metric | What it tells you |
|---|---|
| Clicks | How many times a person clicked your result |
| Impressions | How many times your site appeared in Search |
| CTR | Clicks divided by impressions |
| Average position | The average rank of your highest result |
Google defines average position as the average place of your site’s top result. It is not your fixed rank because results change by location, device, time and user.
There is no single “good CTR” for every page. Compare each page with pages that have a similar rank, search intent, device and search-result layout.
Find Four Easy SEO Opportunities
High impressions with low CTR: Rewrite the title and description so they match the search need. Do not use a clickbait title that your page cannot support.
Average position from 8 to 20: Improve the main answer, headings and internal links. Add missing facts only when they help the reader.
Several pages rank for one query: Check whether they answer the same need. Merge them only when they truly compete with each other.
Impressions rise but clicks stay flat: Your pages may appear for more terms but still rank too low. Google features or weak title text may also reduce clicks.
Data warning: Search Console hides some rare queries to protect user privacy. These queries may still count in the main chart, so query rows may not match the total impressions.
Avoid changing a page after five or ten impressions. Complete your Google Search Console performance audit with enough data, then judge clicks, impressions, CTR and position together.
Step 7: Use GSC to Find Content and Keyword Opportunities
Keyword research with Google Search Console shows the exact search terms that already display your pages on Google. You can use this data to improve old pages and find new content ideas.
Find Keywords That Already Have Impressions
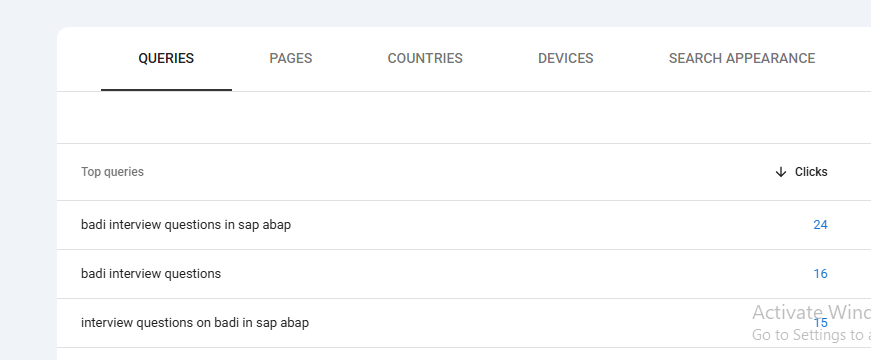
Open Performance, select Search results, and click the Queries tab. Google Search Console shows queries, clicks, impressions, CTR, and average position for your website.
Start with queries that have impressions but few or no clicks. These are often low-hanging fruit keywords because Google already links your page with that topic.
Next, click a query and open the Pages tab. This shows which page appears for that search term.
Search for Useful Query Modifiers
Use the query filter to find words that show clear reader needs. Try terms such as:
- how, why, what, can, does
- best, cost, price, review
- vs, versus, alternative
- fix, problem, error
- near me
You can also use regular expressions to group many terms at once. For question keywords, use:
^(who|what|where|when|why|how|can|does|is)
For buyer-focused queries, use:
(best|price|cost|review|vs|alternative)
Decide Whether to Update or Create
Group related queries by page before adding new text. Do not place every keyword on one page.
Use this simple rule:
| What you find | What you should do |
|---|---|
| Queries share the same search intent | Expand the current page |
| Queries ask for a different result | Create a new page |
| A query appears by chance | Check whether it fits your audience |
| Many pages rank for one query | Review possible keyword overlap |
For example, your article about “starting a blog” may gain impressions for “how much does a blog cost.” Add a short cost section when the reader still wants help starting a blog.
However, “best cheap blog hosting” has a clear buying intent. Create a separate comparison page because that reader wants to choose a service.
Use the Data Carefully
Search Console does not show every search query because Google hides some low-volume terms for privacy. Filtered totals may also change because hidden queries are removed when you apply a query filter.
Never repeat a keyword only to make it appear more often. Use keyword research with Google Search Console as proof of reader interest, then answer that need in clear and natural words.
Step 8: Audit Core Web Vitals, HTTPS, and Page Experience
A Core Web Vitals Search Console audit shows how real people experience your website. It helps you find slow pages, delayed clicks, moving content, and unsafe HTTP URLs.
Understand the Three Core Web Vitals
Google uses three main measures to check page experience. Each one shows a different user problem.
- LCP measures loading speed: Your main image or content should appear within 2.5 seconds.
- INP measures response time: Your page should react to a click or tap within 200 milliseconds.
- CLS measures page movement: Your score should stay at 0.1 or less.
Google uses Core Web Vitals in its ranking systems, but good scores do not ensure top rankings. Your content, links, search intent, and full page experience still matter.
Check Mobile and Desktop Reports
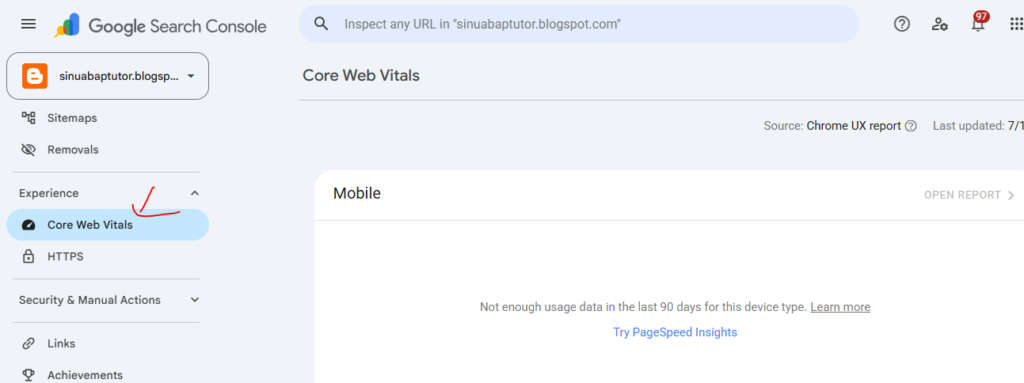
Open Experience → Core Web Vitals in Google Search Console. Check mobile and desktop on their own because users may get very different results.
GSC sorts similar pages into URL groups marked Good, Needs Improvement, or Poor. Fix the group with the most poor URLs first because one theme, plugin, banner, or template may cause the same problem across many pages.
Know Why GSC and PageSpeed Insights Differ
Search Console uses field data from real Chrome users over time. PageSpeed Insights may show this same field data, but it also runs a fresh Lighthouse lab test on a simulated device.
This explains why PageSpeed Insights may show a score of 95 while GSC still marks a URL group as poor. The lab test checks one controlled visit, while field data reflects real phones, networks, regions, and user actions.
Test one page from each poor group in PageSpeed Insights. Then fix shared causes such as large hero images, heavy JavaScript, late cookie banners, moving ads, missing image sizes, or slow hosting.
Why Does Core Web Vitals Show No Data?
A new or low-traffic website may not have enough real-user data. Google also omits URL groups that do not meet its minimum reporting level.
This does not prove that your pages are fast or slow. Use PageSpeed Insights and Lighthouse until enough field data appears, and remember that GSC shows only a sample of indexed URLs.
Check the HTTPS Report
Open the HTTPS report and look for indexed HTTP URLs. Fix invalid certificates, HTTP sitemap links, blocked HTTPS pages, wrong canonical tags, and redirects that send users back to HTTP.
Your aim is not a perfect score at any cost. A useful, clear page with good speed is better than a broken design made only to pass a Core Web Vitals Search Console audit.
Step 9: Audit Structured Data and Search Enhancements
A structured data audit in Google Search Console helps you find broken schema code. It also shows which pages may qualify for rich search results.
Check Your Enhancement Reports
Open Search Console, and look under Enhancements or Shopping. You may see reports for:
- Breadcrumbs
- Product snippets
- Merchant listings
- Videos
- Recipes
- Events
- Job postings
You will only see reports that apply to your site. For example, a simple blog may show Breadcrumbs, while an online shop may show Product and Merchant listing reports.
Read Each Status Correctly
Check the status of each structured data item:
- Invalid: A major error blocks rich-result eligibility.
- Valid with warnings: The item works, but useful details may be missing.
- Valid: Google found no major issue.
Fix invalid items first. Warnings are less urgent, but added details may help Google understand the page better.
Test the Actual Page
Open one affected URL in Google’s Rich Results Test. The tool shows which rich result types Google can read and highlights code errors.
Test one page from each template: one article, product, recipe, event, or job page. Fix the shared template when the same error affects many URLs.
An unparsable structured data error means Google cannot read the code due to a syntax problem. These are critical errors, and one broken template can affect many pages at once.
Keep Your Schema Honest
Your schema must match the content people can see on the page. Do not add fake ratings, hidden FAQs, false prices, or an author who did not write the article.
Add Article, Author, Organization, Product, or Recipe schema only when it fits the page. Valid schema makes your page eligible, but Google does not promise a rich result.
After you publish the fix, return to Search Console and click Validate Fix. Your structured data audit is complete when key templates have valid markup that matches their visible content.
Step 10: Audit Internal and External Links
A Google Search Console links audit shows which pages receive links from your site and other websites. Use it to find weak pages, lost link value, and poor site structure.
Check the Links Report
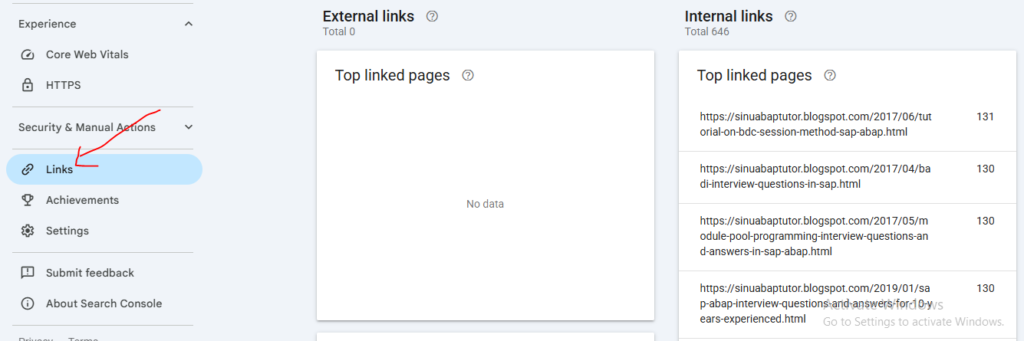
Open Links in Google Search Console. Then review these four reports:
- Top linked pages—internally: Pages receiving the most links from your own site.
- Top linked pages—externally: Pages receiving backlinks from other websites.
- Top linking sites: Domains that link to your website.
- Top linking text: Words other sites use when linking to you.
A backlink means another website links to one of your pages. An internal link joins two pages on your own website.
Find Pages That Need More Internal Links
Your key pages should receive clear, useful links from related posts. This includes your homepage, service pages, category pages, and cornerstone guides.
For example, say you publish a guide about starting a food blog in India. Link to it from your posts about WordPress, hosting, food photography, and blog setup.
Check for these problems:
- Orphan pages with no internal links.
- Cornerstone pages with very few links.
- Archive pages receiving more links than useful content.
- Old URLs still receiving valuable backlinks.
- Important pages hidden several clicks from your homepage.
Google uses links to find new pages and understand what each page covers. Your links must also be crawlable, with clear anchor text that tells readers where the link leads.
Do Not Chase a Magic Link Number
There is no fixed rule such as “add five internal links to every post.” Add a link when it helps your reader take the next useful step.
Use descriptive text such as Google Search Console indexing guide instead of “click here.” Also, avoid adding many forced links that break the reading flow.
A new page may not appear in the internal links report GSC at once. The report shows a sample, and Google may omit non-indexed, duplicate, or recently found URLs.
Check Backlinks in Google Search Console
To check backlinks, open Links, then select Top linking sites or Top linked pages. Export the report when you need to review old URLs, strong pages, or strange linking domains.
Do not treat this report as a full backlink list. Google clearly says the Links report provides a sample rather than every internal and external link it knows about.
Use Ahrefs, Semrush, Majestic, or another backlink crawler for competitor research and wider link discovery. Different tools run their own crawlers, so their backlink totals will rarely match GSC.
Your Google Search Console links audit is complete when key pages receive useful internal links, orphan pages are fixed, and valuable backlinks point to live URLs. Keep the structure simple: every important page should be easy for both your reader and Google to find.
Step 11: Google Search Console Settings: Issues and Fixes
A Google Search Console settings audit helps you check access, site links, data exports, and Googlebot activity. Open Search Console → Settings, then review each item from top to bottom.
The settings on this page apply only to the property you have open. So, check the property name before you change anything.
General Settings
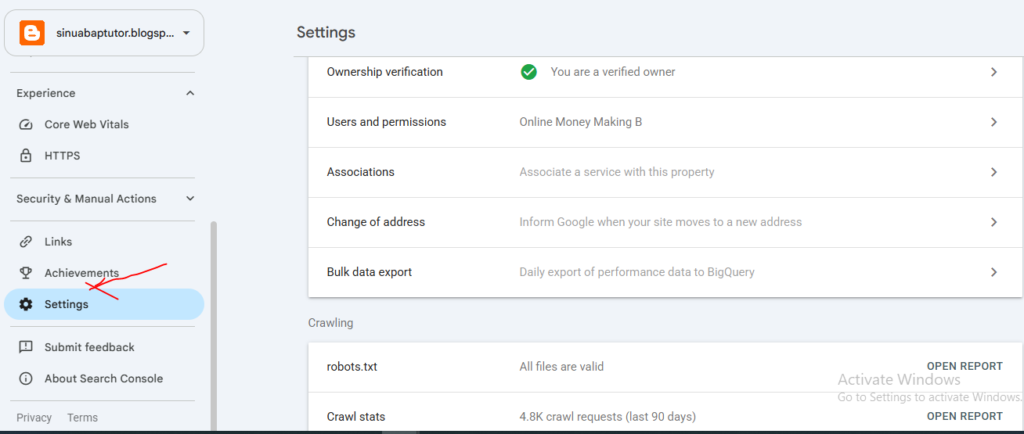
The General settings area shows who owns your property and who can use its data. It also lets you connect Google services or report a domain move.
Check this area after a site launch, staff change, agency change, or domain move. A wrong setting can expose private search data or delay a clean site migration.
Ownership Verification
The message “You are a verified owner” means Google has confirmed that you control the website. A verified owner gets full access to Search Console tools, reports, users, and settings.
Do not remove the DNS record, HTML file, meta tag, or other method used for verification. Google may check your proof again and remove your owner access if that proof goes away.
How to Check Ownership
- Open Settings.
- Select Ownership verification.
- Check the verification method.
- Confirm that the method still works.
- Keep a second verified owner as backup.
A Domain property often uses a DNS TXT record for verification. Ask your domain host before you delete any DNS record that contains Google site verification text.
Common Ownership Issues and Fixes
| Issue | Why It Happens | Fix |
|---|---|---|
| Verification failed | The DNS record has not updated yet | Check the record and allow more time |
| HTML file not found | The file was moved or deleted | Upload it again to the same URL |
| Meta tag missing | A theme or plugin removed the tag | Add the tag back inside the page head |
| Access vanished after a redesign | The verification code was removed | Restore the old method or verify again |
| Old agency is still an owner | Access was never removed | Review all owners and remove old access |
DNS updates can take time because each domain host handles them in a different way. Do not add many duplicate records while you wait.
Users and Permissions
The Users and permissions page controls who can see or change your Search Console property. Review it often because former staff, developers, and SEO firms may still have access.
Search Console has owner, full-user, and restricted-user access levels. Owners have full control, while full and restricted users receive less control.
Give Each Person the Least Access They Need
- Owner: Use this for the main business owner or trusted site lead.
- Full user: Use this for an SEO worker who needs reports and common actions.
- Restricted user: Use this for a writer or client who only needs basic data.
- No access: Use this for anyone who no longer works on the site.
Never give owner access only because a person needs to read a report. Full control lets that person add users, change settings, and access all property data.
How to Add a User
- Go to Settings → Users and permissions.
- Click Add user.
- Enter the person’s Google Account email.
- Pick the right permission level.
- Click Add.
Use a work email where possible, rather than a shared personal account. This makes access easier to trace when your team changes.
Permission Problems and Fixes
| Problem | Fix |
|---|---|
| A writer cannot see the property | Add the correct Google Account |
| A user cannot change settings | Give full access only when the work needs it |
| An old worker still has access | Remove the user at once |
| No one knows the main owner | Check all verified and delegated owners |
| One account controls everything | Add a second trusted verified owner |
Run this access check once every three months. Also run it on the same day that an employee or agency leaves your project.
Associations
Associations connect your Search Console property with another Google service. These links can let the other service use Search Console data or confirm the relationship between both properties.
Available services may depend on your website and account setup. Only create an association when you know why the service needs it.
Common Association Uses
You may connect Search Console with services such as Google Analytics, a Chrome Web Store account, Google Ads, or Google Merchant Center. The exact options shown in your account can change based on the property and service.
For an online shop, a Merchant Center link can support product and store work. For a blog, an Analytics link can help you compare search clicks with user actions on the site.
Association Issues and Fixes
- Check that both services use the correct website.
- Confirm that you have enough access in both accounts.
- Remove links to old accounts or old agencies.
- Do not link a test site to a live business account.
- Check HTTP, HTTPS,
www, and non-wwwversions.
An association does not merge all data into one report. It only allows supported data or actions to pass between the linked services.
Change of Address
Use Change of address when you move a site from one domain or subdomain to another. For example, use it when you move from oldsite.com to newsite.com, but not when you only change page folders.
Run this tool only after the new site works and the old URLs redirect to matching new URLs. Google says the tool helps move Search signals from the old site to the new site.
Before You Submit a Domain Move
- Verify the old property.
- Verify the new property.
- Create one-to-one permanent redirects.
- Keep the same main content where possible.
- Update canonical tags.
- Submit the new sitemap.
- Update internal links.
- Test key old URLs.
- Keep the old domain active.
Do not redirect every old page to the new homepage. Send each old URL to its closest matching new page.
Common Migration Errors
| Error | Better Action |
|---|---|
| Old pages return 404 | Add permanent redirects |
| All URLs point to the homepage | Map each URL to a close match |
| New pages use old canonicals | Change canonicals to new URLs |
| Old sitemap stays active | Submit the new sitemap |
| Old domain expires fast | Keep it active during the move |
| Address tool used before redirects | Complete and test redirects first |
Do not use Change of address for an HTTP-to-HTTPS move on the same domain. Also avoid it for simple design changes or moves between folders.
Bulk Data Export
Bulk data export sends Search Console performance data to Google BigQuery each day. It suits large sites, long reports, custom dashboards, and teams that need more data than the normal interface offers.
A small new blog does not need this feature on day one. The normal Performance report is often enough until your site builds steady search data.
When Bulk Export Helps
Use it when you need to:
- Keep daily search data for a long time.
- Study many pages and queries.
- Build Looker Studio reports.
- Join search data with business data.
- Review patterns with SQL.
- Store data beyond normal report needs.
You must create a Google Cloud project, enable BigQuery, and set up the needed access. You also need owner permission in Search Console to start or stop the export.
Bulk Export Costs and Risks
Search Console does not charge you to send the data. However, BigQuery may charge for storage and queries after you pass its free usage level.
Set a data expiry rule when you do not need records forever. Also set budget alerts so that a large or poor SQL query does not create a surprise bill.
Crawling Settings
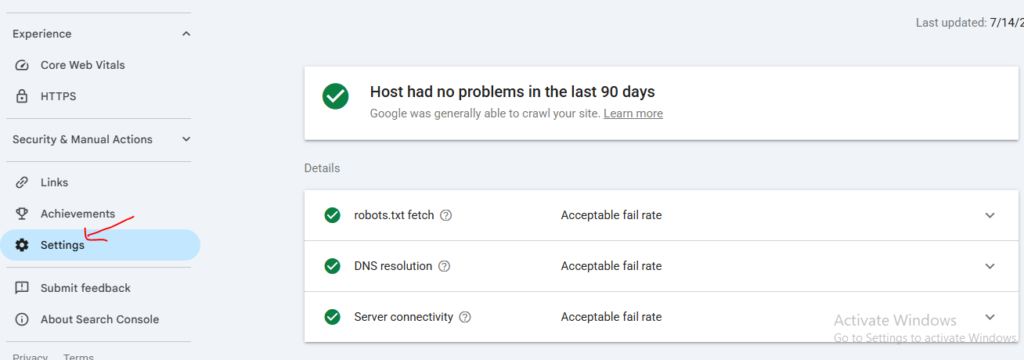
The Crawling area shows whether Google can read your robots.txt file and how often Googlebot visits your site. These reports help you spot blocks, server faults, crawl spikes, and slow pages.
Do not judge crawling from one number alone. Compare the current pattern with your normal site size, updates, server health, and past crawl activity.
Robots.txt Status
A Valid robots.txt status means Google can fetch and process the file. It does not mean every rule inside the file is good for your SEO.
The robots.txt report covers files Google found on up to the top 20 hosts for the property. It also shows the last crawl time, warnings, and errors.
What to Check in Robots.txt
Open your live file at:
https://yourdomain.com/robots.txt
Then check for rules that block important sections, posts, images, scripts, style files, or product pages. A simple typing error can block a whole folder.
Dangerous Example
User-agent: *
Disallow: /
This rule asks all listed crawlers not to crawl the whole site. Remove the final slash after Disallow: when you want to allow normal crawling.
Safer Basic Example
User-agent: *
Disallow:

Sitemap: https://example.com/sitemap.xml
This basic file allows crawling and points to the sitemap. Your site may need other rules, so do not copy any robots file without checking your platform.
Robots.txt Issues and Fixes
| Status or Issue | What to Do |
|---|---|
| Valid | Review the rules, not just the status |
| Not found | Add a file when your site needs crawl rules |
| Blocked page | Remove the matching Disallow rule |
| File returns 5xx | Fix the server or hosting fault |
| Old rules remain | Update the file and request a recrawl |
| Wrong sitemap URL | Add the live canonical sitemap URL |
Do not use robots.txt to remove private content from Google. Use login protection for private data, and use a valid noindex method for public pages that should not appear in Search.
Crawl Stats
The Crawl stats report shows Google’s crawl history for your site. It includes request counts, downloaded data, response time, file types, Googlebot types, and server response codes.
Your report shows 3.14K crawl requests in the last 90 days, which is about 35 requests per day. That number is not good or bad by itself because crawl demand varies by site.
How to Read 3.14K Crawl Requests
A small blog with 20 pages may need a closer check if thousands of requests hit tag, feed, search, and parameter URLs. A larger site with many pages may see 3.14K requests as a low and normal amount.
Open the report and review these parts:
- Host status: Check whether Google had access problems.
- Total crawl requests: Look for sudden rises or falls.
- Total download size: Watch for large files or pages.
- Average response time: Look for slow server replies.
- Response codes: Check 200, 301, 404, and 5xx totals.
- File types: See whether Google crawls HTML, images, CSS, or scripts.
- Googlebot type: Review smartphone, image, and other crawler activity.
A crawl spike may come from a site update, new pages, redirect loops, duplicate URLs, or a large sitemap change. A sharp fall may point to server trouble, crawl blocks, fewer useful pages, or normal demand changes.
Crawl Problems and Practical Fixes
| Crawl Pattern | Possible Cause | Practical Fix |
|---|---|---|
| Many 5xx responses | Server failure | Check hosting and server logs |
| Many 404 requests | Deleted or broken URLs | Fix links or keep valid 404 replies |
| Slow response time | Heavy theme, plugin, or server | Improve caching and hosting |
| Many redirect requests | Long redirect chains | Link straight to the final URL |
| Many parameter URLs | Filters or tracking links | Clean internal links and canonicals |
| Sudden crawl drop | Access issue or lower demand | Check host status and robots.txt |
| Large file downloads | Heavy images or scripts | Compress and remove unused files |
Do not try to force a fixed crawl number. Your goal is simple: let Googlebot reach useful pages fast without wasting requests on endless duplicate URLs.
About: Property Added to Account
The About area shows when the property was added to your Search Console account. This date helps you judge how much data the reports can hold for your account view.
A new property may show little or no performance data at first. Do not treat an empty report on the first day as an SEO fault.
Record the property-added date in your audit notes. Then compare it with the site launch date, sitemap submission date, and first indexed-page date.
Quick Google Search Console Settings Checklist
Before you leave the Settings page, confirm these key points:
- You remain a verified owner.
- You have a second trusted owner.
- Old users no longer have access.
- Each user has the lowest safe permission.
- Associations point to the correct accounts.
- Change of address is unused unless the domain moved.
- BigQuery export has a clear need and budget control.
- Robots.txt is valid and does not block key pages.
- Crawl stats show no major server errors.
- The property-added date appears in your audit record.
A Google Search Console settings audit is not a one-time setup task; it is a short safety check for your website. Review it every three months and after any domain, team, hosting, platform, or SEO agency change.
Step 12: Investigate Traffic Drops Correctly
A Google Search Console traffic drop audit helps you find what changed before you start fixing pages. Do not blame a Google update as soon as your clicks fall.
Find Where the Drop Started
Open Performance, select Search results, and compare two equal date ranges. Compare the last 28 days with the prior 28 days, or compare the same weeks from two different years for a seasonal site.
Next, find the exact area that lost traffic:
- Sitewide: Most pages and queries lost clicks.
- Directory-level: One folder, such as
/blog/, lost traffic. - Page-level: One page caused most of the loss.
- Query-level: People stopped finding you for certain searches.
- Country-level: Traffic fell in one nation or region.
- Device-level: Mobile or desktop traffic dropped alone.
Check the Pages tab first, and then open the Queries, Countries, and Devices tabs. This simple order stops you from making changes to pages that still perform well.
Identify the Real Cause
Use this quick diagnosis table:
| What changed? | Likely cause | What you should check |
|---|---|---|
| Impressions and position fell | Ranking decline | Content, links and recent Search updates |
| Impressions fell, but position stayed close | Lower search demand | Google Trends and seasonal demand |
| Impressions stayed stable, but clicks fell | CTR decline | Titles, snippets and search-result changes |
| Indexed pages fell | Deindexing or crawl issue | Page indexing and URL Inspection |
| GSC changed, but analytics stayed stable | Reporting issue | Search Console data anomalies |
Google lists technical problems, security issues, manual actions, algorithm changes, seasonality and changing search demand as common causes of traffic loss. It also recommends using Google Trends to check whether fewer people are searching for the topic.
Check Technical Problems Before Editing Content
Open Manual actions, Security issues, and Page indexing. Then inspect a few affected URLs to check their crawl status, index status, canonical URL and last crawl date.
Use Page indexing when the whole site or a large section drops. Use URL Inspection when only a small group of pages is affected.
Also review any work done before the fall: a migration, redesign, URL change, deleted page, new canonical tag or robots.txt edit. One wrong sitewide setting can remove many pages faster than any content update.
Check Google’s Records
Search Console can sometimes show a dip because Google changed its reporting method or had a logging problem. Check Google’s official data-anomaly page and Search Status Dashboard before assuming that your website failed.
Finish your Google Search Console traffic drop audit only after you name the loss: ranking, demand, CTR, indexing or reporting. Fix that cause first, and leave unaffected pages alone.
How to Help Google Discover and Index a New Website Faster
You can index a new website on Google faster by making each page easy to find, crawl, and understand. Still, no tool or SEO trick can force Google to index a page.
Google finds most new pages by following links from pages it already knows. It then crawls the page, studies its content, and decides whether to add it to its search index.
Follow This Safe Indexing Process
- Make the page public: Open the page in a private browser window. Remove passwords, login walls, and maintenance mode.
- Check the HTTP status: Your live page should return a
200 OKresponse. Fix server errors, redirect loops, and broken URLs first. - Remove an accidental noindex tag: Check the page source or your SEO plugin. The page must not contain a
noindexrule when you want it in Google. - Allow Googlebot to crawl the page: Check your
robots.txtfile. Do not block important posts, pages, scripts, or page resources. - Add a self-referencing canonical: Point the canonical tag to the main version of that page. This helps Google avoid HTTP, HTTPS,
www, and URL-parameter copies. - Place the URL in a clean sitemap: Include only live, canonical, and indexable URLs. A sitemap helps Google discover pages, but it does not order Google to index them.
- Add useful internal links: Link to the new page from your homepage, category page, or a related indexed post. Do not leave a key page hidden with no path leading to it.
- Give the page a clear purpose: Answer one real search need better than your other pages. Thin, copied, repeated, or almost empty pages may stay outside the index.
- Use URL Inspection once: Run a live test after you fix all issues, then select Request Indexing. Google says a crawl request does not promise fast crawling or inclusion in search results.
- Monitor instead of resubmitting: Check the Page indexing report and URL Inspection tool after a few days. Google says crawling may take from a few days to a few weeks.
Why Is Only Your Homepage Indexed?
This issue is common on new sites: owners submit a sitemap, request indexing, and still see only one or two pages in Google. The same concern appears often in Reddit and Google Search Console support discussions.
Do not keep submitting every URL by hand. Instead, check this order: crawl access, noindex, canonical tag, HTTP status, sitemap, internal links, and content value.
Backlinks can also help Google find a new website because crawlers move through links across the web. Yet one good link from a real, relevant site is more useful than many spam links.
The best way to index a new website on Google faster is simple: build clear pages, connect them with useful links, and keep your server stable. Request indexing only after the page passes every technical check.
What Google Search Console Cannot Tell You
A Google Search Console SEO audit shows how Google crawls, indexes, and displays your pages. However, it does not provide a full website audit or explain everything happening after a person visits your site.
Where GSC Falls Short
Search Console does not crawl every internal URL like a technical SEO crawler. Therefore, it may not give you a full list of broken links, duplicate titles, missing meta descriptions, or weak internal links.
It also does not show competitor rankings, keyword gaps, or a complete backlink database. Some low-volume search queries are hidden for privacy, while fresh performance data may take two or three days to appear.
GSC also cannot measure sales, form submissions, engagement time, or other visitor actions. You need Google Analytics 4 or another analytics tool for user behaviour and conversions.
GSC vs SEO Audit Tools
| Your need | Best tool |
|---|---|
| Google indexing and search queries | Google Search Console |
| Sales, visits, and engagement | GA4 |
| Full technical website crawl | Screaming Frog or Sitebulb |
| Competitor keywords and backlinks | Semrush or Ahrefs |
| Website speed checks | PageSpeed Insights |
| Bing search data | Bing Webmaster Tools |
For example, Screaming Frog crawls your internal pages and checks titles, descriptions, headings, and links in bulk.
My practical rule is simple: start with GSC, but never stop there. A complete Google Search Console SEO audit works best when you combine GSC with analytics, a crawler, and a competitor research tool.
Your 60-Minute Google Search Console Audit Checklist
Use this Google Search Console audit checklist once each month. In just 60 minutes, you can find urgent errors and clear SEO growth chances.
First 10 Minutes: Check Critical Issues
First, select the correct website property. Then, open Security Issues, Manual Actions, and recent Search Console messages.
A manual action may lower or remove pages from Google Search. Fix these warnings before you work on keywords, titles, or content.
Next, inspect your homepage with the URL Inspection tool. Check whether Google can crawl, index, and show the correct version of the page.
Next 15 Minutes: Check Indexing
Open the Sitemaps report and confirm that your sitemap shows “Success.” Remember: a valid sitemap helps discovery, but it does not promise indexing.
Next, compare indexed pages with the pages you want Google to index. Review the main reasons for pages being blocked, excluded, redirected, or marked as duplicates.
Inspect five key URLs: your homepage, main service page, category page, best post, and newest post. Also, compare your chosen canonical URL with Google’s selected canonical.
Next 10 Minutes: Check Page Experience
Review Core Web Vitals for mobile and desktop pages. Focus on poor URL groups linked to LCP, INP, or CLS issues.
Then, check the HTTPS report and enhancement errors. Test one page from each problem group instead of checking every URL.
Next 15 Minutes: Find SEO Growth Chances
Set the Performance report to the last 28 days. Review your top pages, queries, clicks, impressions, CTR, and average position.
Look for pages with high impressions but few clicks. Also, find keywords ranking between positions 8 and 20; these often need better content, titles, or internal links.
Compare mobile and desktop results. Then, check whether one country creates most of your traffic or hides a sudden fall.
Final 10 Minutes: Build Your Action Plan
Do not leave with a long list of random errors. Record each finding with these six details:
- Severity: critical, high, medium, or low.
- Affected URL or page group.
- Person responsible for the fix.
- Exact action required.
- Success measure.
- Review date.
Finish your 60-minute SEO audit by fixing one critical issue first. This turns your GSC SEO checklist into real website growth, not another unused report.
Weekly, Monthly, and Post-Publishing GSC Routine
A simple Google Search Console routine helps you find SEO problems before they grow. You do not need to check every report each day.
What to Check Each Week
Check GSC once a week for about 15 minutes. Start with messages, Manual Actions, and Security Issues.
Then, review clicks, impressions, top pages, and search queries. Look for sharp drops, sudden gains, or pages that lose all impressions.
Check the Page indexing report for new errors. However, do not treat every excluded URL as a problem because some redirects, duplicate pages, and noindex pages are normal.
Inspect important new posts with the URL Inspection tool. Test the live page when its index status looks old or wrong.
What to Check Each Month
Compare the latest 28 days with the previous 28 days. This view helps you spot clear changes without reacting to one slow day.
Review these items:
- Branded and nonbranded search queries.
- Pages with high impressions but low clicks.
- Important pages that are still not indexed.
- Mobile and desktop Core Web Vitals groups.
- Internal links pointing to key pages.
- Traffic changes by page, device, and country.
Export the results into a simple sheet. Add the issue, affected page, next action, and review date.
What to Do After Publishing a Post
Link the new post from one or two related pages. Also, confirm that your CMS adds the URL to your XML sitemap.
Use URL Inspection to test the live page. Request indexing once when the page is important and ready for readers.
Do not send the same request each day. Google says crawling may take a few days or several weeks, and a request does not guarantee indexing.
What to Check After a Redesign or Site Move
Test old-to-new redirects, canonical tags, sitemap URLs, and robots rules. Then, compare indexed page groups and search performance.
Some ranking movement is normal after a large site move. Google says a medium-sized site may need a few weeks for most changed URLs to move through its index.
Keep this Google Search Console routine simple: check weekly, review deeply each month, and inspect pages after major changes. This habit gives you useful signals without wasting time on daily report noise.
Common Google Search Console Audit Mistakes
A Google Search Console audit can give you the wrong answer when you read its data without context. Avoid these common Google Search Console mistakes before you change your pages.
Auditing the Wrong Property
First, check whether you opened the correct domain, HTTPS, HTTP, www, or non-www property. The wrong property may show missing pages, low clicks, or no useful data.
Expecting Data at Once
Do not expect full reports just after you verify a new website. Google must first discover your pages, crawl them, index them, and collect search data.
Treating Every Excluded Page as an Error
You do not need every website URL in Google’s index. Redirects, duplicate pages, tag archives, deleted pages, and planned noindex pages may be valid exclusions.
Confusing Crawling With Indexing
Crawling means Google visited the page; indexing means Google may store and show it in Search. A crawled page does not gain automatic indexing or rankings.
A successful sitemap also does not mean every URL is indexed. It only helps Google find the URLs you submit.
Requesting Indexing Every Day
Do not press Request Indexing each morning for the same page. Use it after publishing an important page or fixing a real indexing problem.
Blocking Google From Reading noindex
Do not block a page in robots.txt while asking Google to read its noindex tag. Google must crawl the page before it can see that rule.
Ignoring Google’s Canonical Choice
Check both your chosen canonical and Google-selected canonical. Different choices may point to duplicate content, mixed internal links, redirects, or sitemap errors.
Reading Performance Data Too Literally
Do not change a title after ten impressions and one click. Small samples can make CTR look much better or worse than it is.
Average position is also not your fixed Google rank. It is an average made from many queries, devices, places, and search results.
Search Console clicks will not match GA4 sessions exactly because the tools measure different actions. Use GSC for search visibility and GA4 for on-site visitor behaviour.
Fixing Pages Instead of the Template
When hundreds of URLs show the same error, check the shared theme, plugin, template, or server rule. One template fix may repair every affected page.
Finally, do not use the Removals tool as a permanent deletion method. It normally hides a URL for about six months; delete it, protect it, or use noindex for a lasting fix.
A careful Google Search Console audit separates real GSC audit errors from normal website behaviour. Fix blockers first, study enough data, and test the cause before changing your site.
Frequently Asked Questions About Google Search Console SEO Audits
A Google Search Console SEO audit helps you find indexing, search traffic, page experience, link, and technical SEO issues. These quick answers explain what each report means and what you should do next.
Can Google Search Console perform a complete SEO audit?
No; Google Search Console cannot perform a full website SEO audit by itself. It shows how Google crawls, indexes, and displays your pages, but you still need a crawler, speed tool, analytics platform, and competitor research tool for a complete audit.
How long does it take a new website to appear in GSC?
A new property may need several days before its first reports show useful data. Google says data for a new website or newly added property can take up to one week to appear.
How long does Google take to index a new page?
Google may crawl a new page within days, but some pages take several weeks. There is no fixed indexing time because Google checks page quality, uniqueness, links, technical access, and other signals before adding it to the index.
Does submitting a sitemap guarantee indexing?
No; sitemap submission does not guarantee crawling, indexing, or rankings. Google treats your sitemap as a hint that helps it discover important pages, so each URL must still be accessible, useful, canonical, and indexable.
Why is my sitemap successful but my pages are not indexed?
“Success” means Google could read and process your sitemap; it does not mean Google accepted every URL. Check the Page indexing report for thin content, duplicate pages, incorrect canonicals, redirects, noindex tags, server errors, or crawl blocks.
Should I request indexing for every new blog post?
You can request indexing for an important new post after checking its live URL. However, do not submit the same URL again and again because repeated requests do not make Google crawl it faster, and the tool has usage limits.
What does “Crawled—currently not indexed” mean?
Google visited the page but chose not to add it to its index at that time. Review its originality, search purpose, main content, internal links, canonical tag, page rendering, and similarity to other pages before requesting indexing again.
What does “Discovered—currently not indexed” mean?
Google knows the URL exists but has not crawled it yet. Link the page from relevant indexed content, keep it in a clean sitemap, improve server performance, and remove large groups of weak or duplicate URLs that waste crawl attention.
Why does Google choose a different canonical URL?
Google may see another URL as the best version because your pages have duplicate or very similar content. Make your preferred URL clear through matching canonical tags, internal links, sitemap entries, redirects, HTTPS settings, and consistent page content.
Why does GSC show no Core Web Vitals data?
Your property may be new, or Google may not have enough real-user Chrome data for mobile or desktop. Test key pages with PageSpeed Insights while you wait because “no data” does not mean that your pages are fast or slow.
Why do clicks in GSC not match GA4 sessions?
GSC measures clicks from Google Search, while GA4 records sessions through tracking code after the page loads. Cookie consent, ad blockers, time zones, tracking errors, repeat visits, redirects, and different measurement rules can create normal gaps between both reports.
How often should I perform a Search Console audit?
Check important warnings, indexing changes, and unusual traffic drops once each week. Perform a deeper audit each month, and run an extra audit after a redesign, migration, large content update, server problem, or sharp loss of clicks.
Can GSC show all backlinks to my website?
No; the Links report shows only a sample of the internal and external links Google has found. Its tables can also stop at 1,000 rows, so use it for patterns rather than treating it as a full backlink database.
Can Search Console help me rank in Bing?
Google Search Console only reports performance from Google Search, so it cannot directly improve your Bing rankings. Create a Bing Webmaster Tools account, import your verified GSC property, submit your sitemap, and review Bing’s own crawl and search reports.
Is Google Search Console enough for a small website?
GSC is enough for your basic Google indexing, search query, sitemap, link, security, and page experience checks. Still, pair it with GA4 and PageSpeed Insights; add a site crawler when you need to find broken links, duplicate metadata, redirect chains, or hidden technical problems.
A monthly Google Search Console SEO audit gives you a clear view of what Google can find, index, and rank. Fix access and indexing problems first; then improve weak pages, internal links, search snippets, and user experience.
Should You Add FAQ Schema?
Add FAQ schema only when every question and answer appears visibly on the page and follows Google’s structured-data rules. Valid markup does not promise a rich result because Google decides when and where enhanced search features appear.
Conclusion: Turn GSC Reports Into a Clear SEO Plan
A Google Search Console SEO audit checklist helps you find what needs your attention first. Start with trust and security, then check crawlability, indexation, page experience, search performance, and growth opportunities.
GSC does not fix your website for you; it shows where the problem may be. You still need to review each page, find the real cause, and apply the right fix.
Remember: Google can index a page only when it can reach it, understand it, and see enough value in it. A submitted sitemap or indexing request cannot replace useful content, clean technical setup, and strong internal links.
Start now: inspect your homepage and three key pages. Mark each issue as critical, important, or low priority, then fix indexing and SEO issues before working on CTR or higher rankings.
Use this Google Search Console SEO audit checklist each month to audit your website with GSC and keep your SEO work focused.


Leave a Reply